KUPF Services

FAQ Group: Scan & Kassa, Point of Sale & Tap to Pay

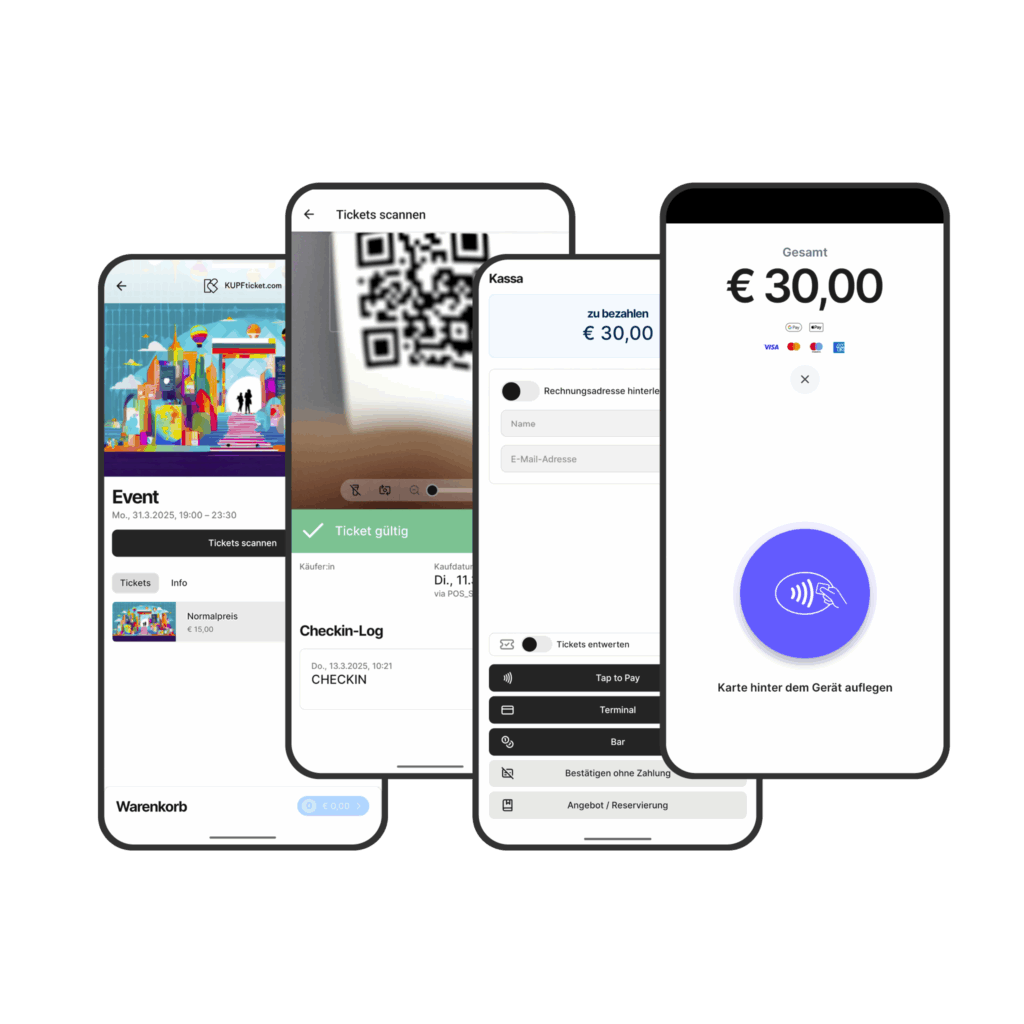
  • Tap to Pay

    You can enable the feature directly in the app. If you run into problems, you can check the payment provider’s list to see whether your smartphone is supported:

    Supported mobile phones

    Simply sign in to the app with your KUPFticket.com login details to get access to your shop:
    ✔ Now you can sell tickets and vouchers and accept donations directly in the app:
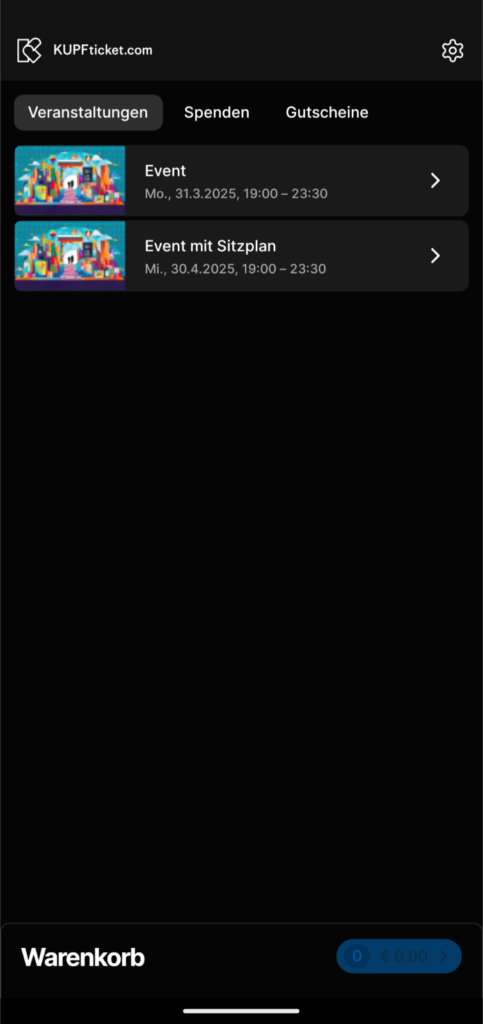
    ✔ Convenient shopping cart handling
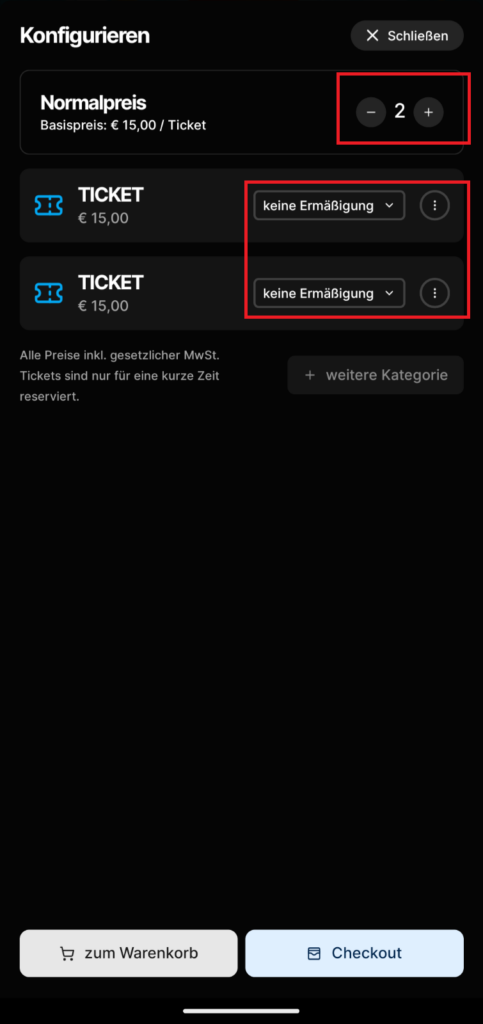
    ✔ With the app, you can sell general admission tickets and reserved-seat tickets:
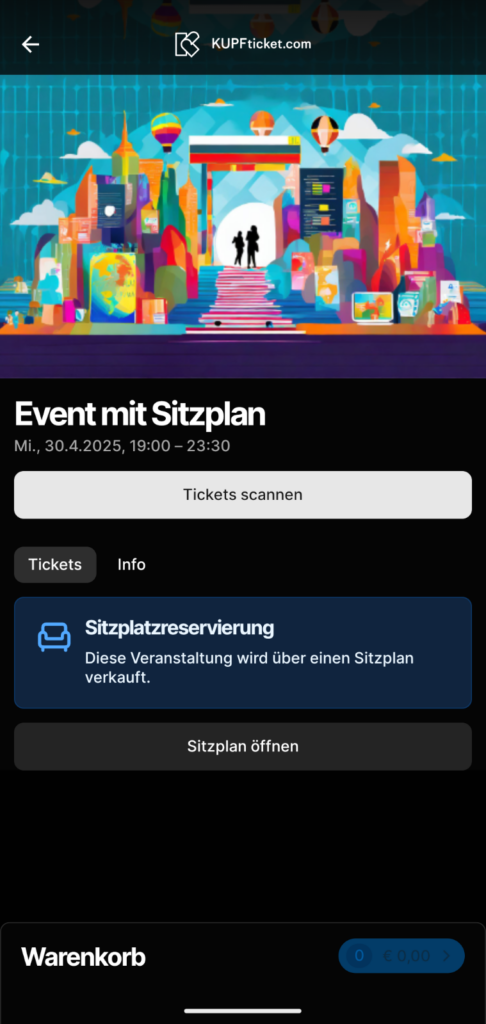
    Easy ticket sales with the Tap to Pay feature work with debit cards, credit cards as well as Google Pay and Apple Pay:
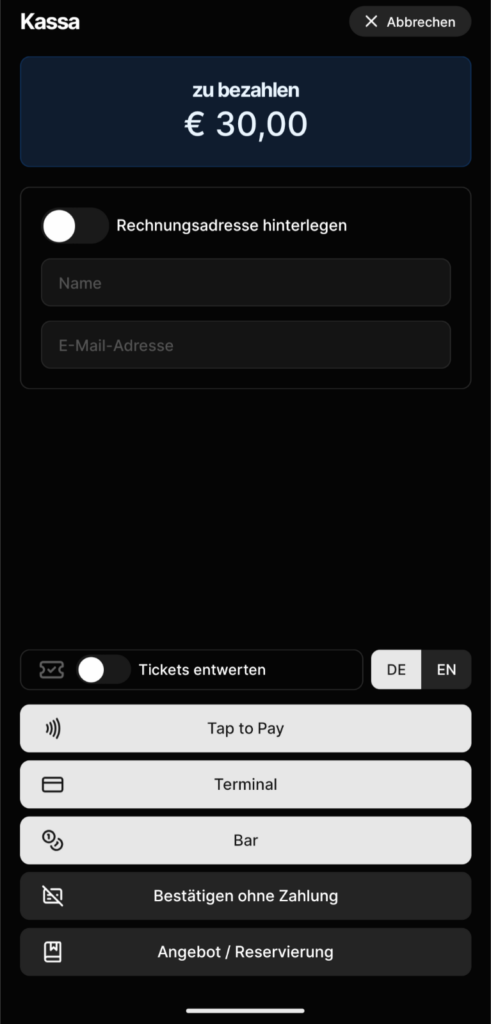
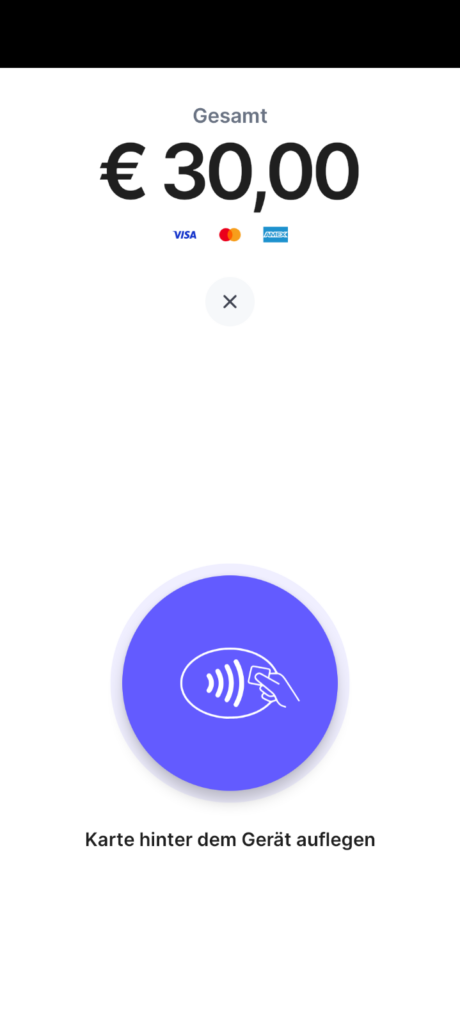
  • App access

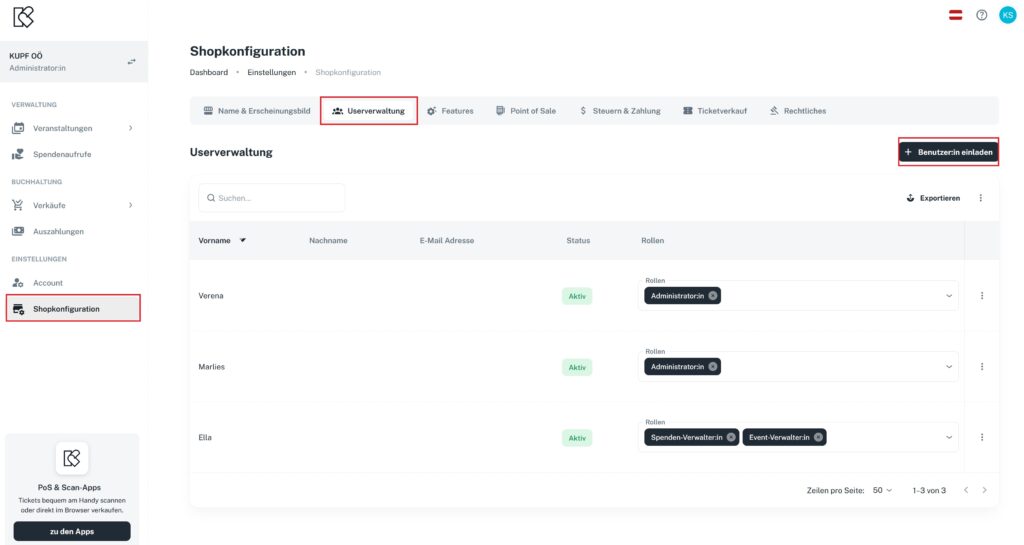
    User management and roles: The familiar user management lets you add new users to the shop. They can either only scan tickets or also sell them. That way, your admin login stays secure.

  • Point of sale – configure ticket printer

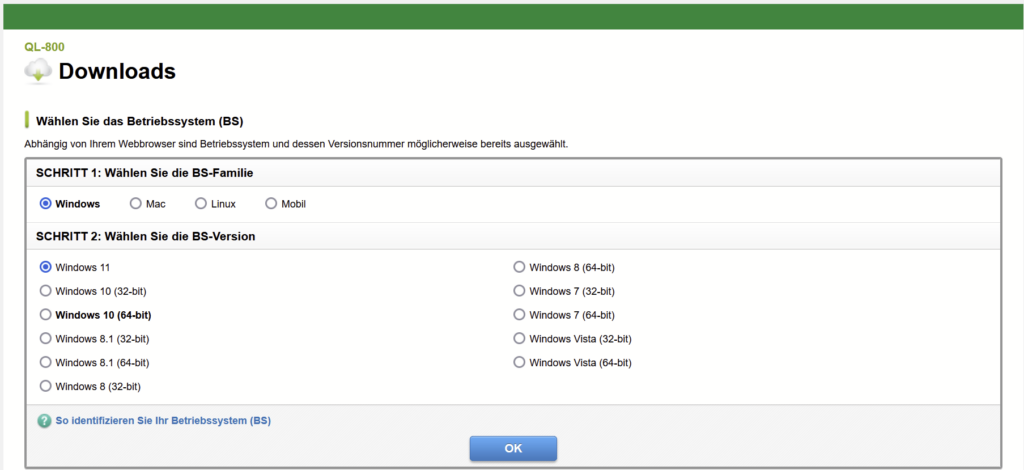
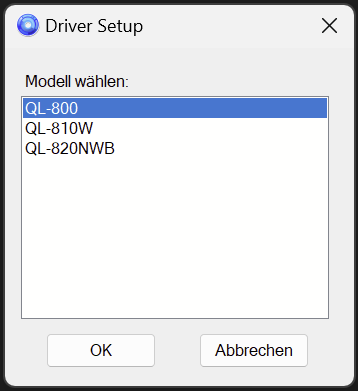
    1) Install the driver
    https://www.brother.de/support/ql-800/downloads

    2) Connect the device to the PC via USB cable

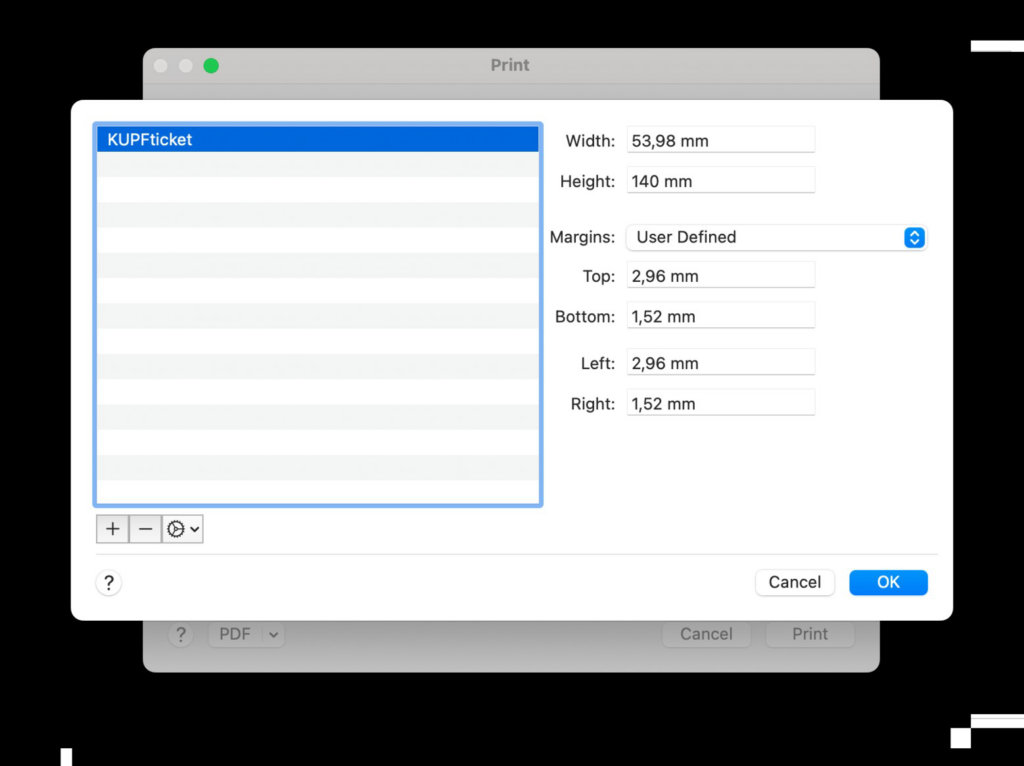
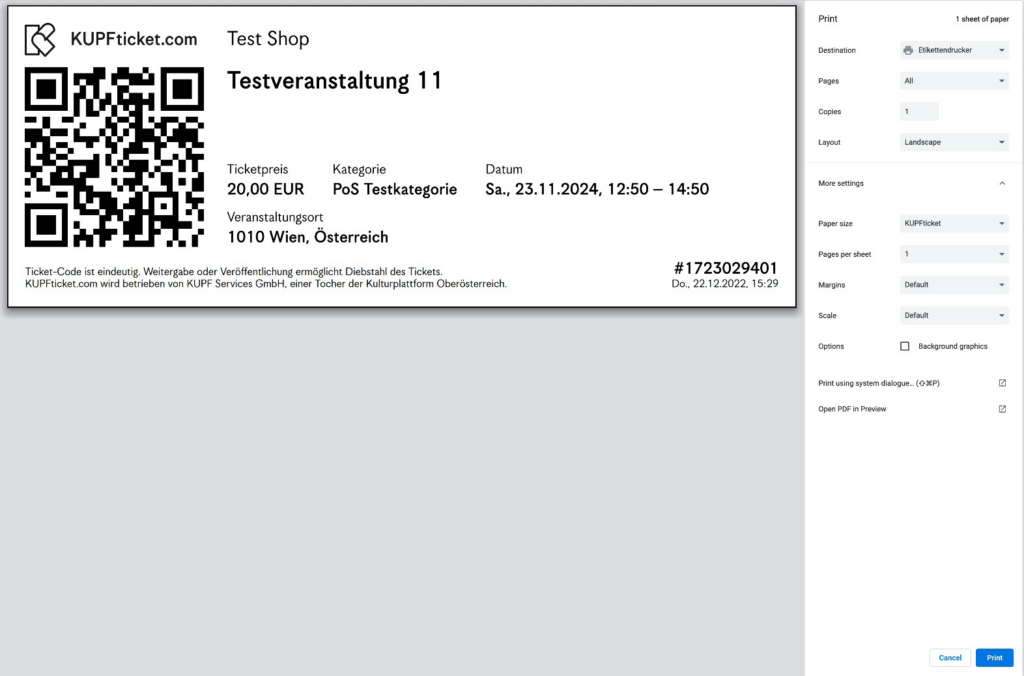
    3) Open the print settings in the PC’s system settings (not in the browser), select 54 mm as the ticket width and manually set the ticket length to 140 mm.

    4) In the browser’s print dialog, define the following settings:

  • Point of sale – ticket rolls

    Here you can find the ticket rolls for the ticket printer:
    Brother Store

    You can find cheaper alternatives in the usual online shops.

  • Point of sale – reservations

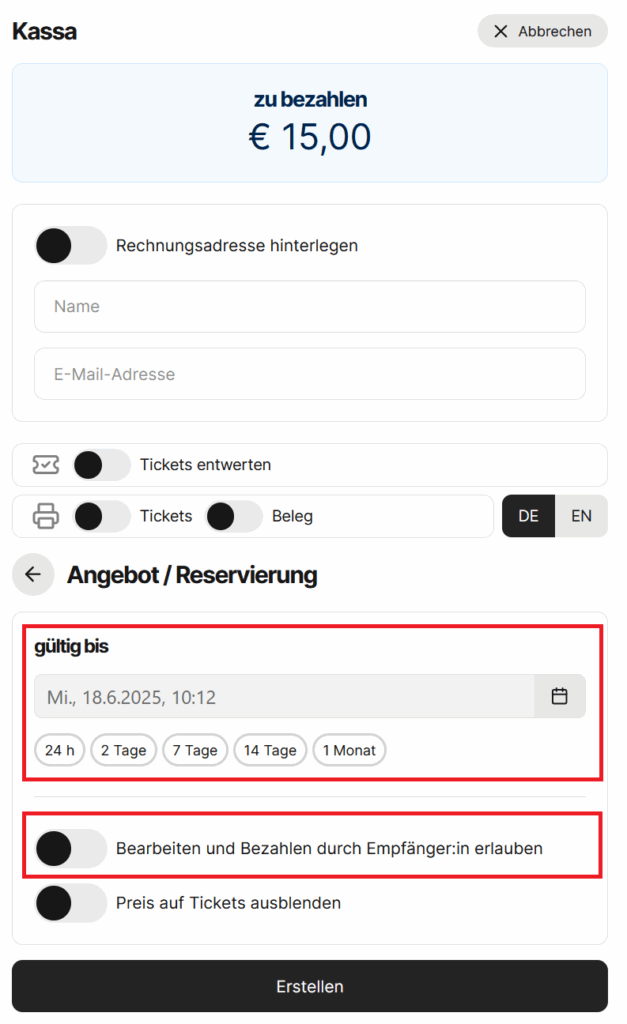
    You can take reservations in the point of sale via the option “Create offer / reservation“.

    If you enter the buyer’s email address and enable the option “Allow editing and payment by recipient”, the buyer can complete the payment process themselves.

    Screenshot of the shopping cart

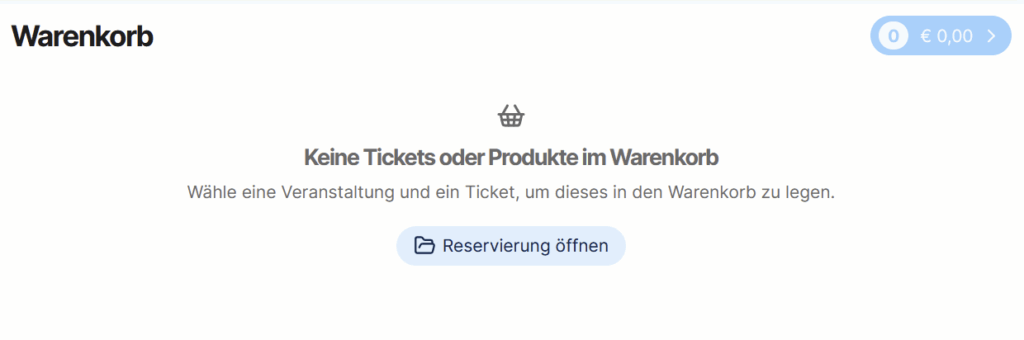
    Under “Open reservations”, you can open reservations in the shopping cart at any time and complete the payment process (in cash or via terminal).

    Screenshot of an empty shopping cart
  • Point of sale – buy or rent hardware

    Order now!

    Point of sale (POS) stations such as box offices or advance sales outlets can be equipped with directly integrated card terminals and a printing system. The Stripe terminal connects to the ticket shop via the internet. The printer is connected to the PC or laptop via USB.

    Purchase

    POS card terminal: €299 net + VAT
    POS card terminal docking station: €45 net + VAT
    POS printer: €139.00 net + VAT

    Rental

    POS card terminal: €12 net + VAT per day
    POS card terminal docking station: €2 net + VAT per day
    POS printer: €6 net + VAT per day

    Per rental, a flat fee of €30 net + VAT for preparation and return, regardless of the number of devices.

    In case of damage to the devices, the renter is liable for repair or replacement costs.

    Please order in good time – depending on device availability, delivery can take up to three weeks.

  • Point of sale – how do I sell tickets?

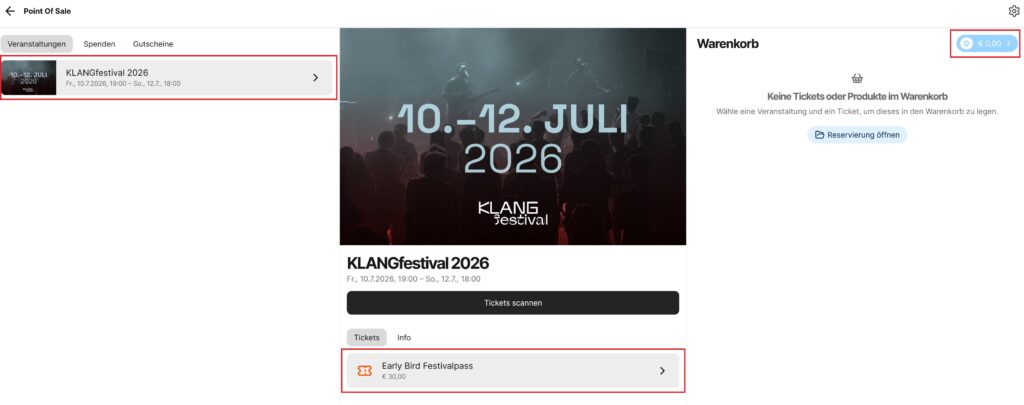
    1) Select the event and category:

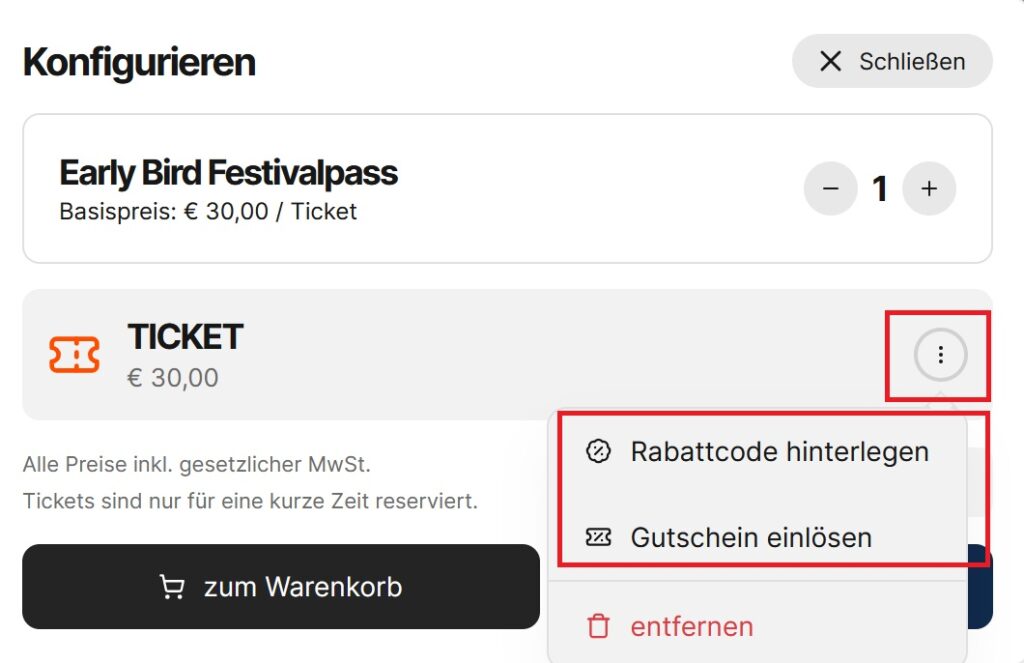
    2) If the tickets are to be personalized or a discount needs to be selected, you can configure this in the next step:

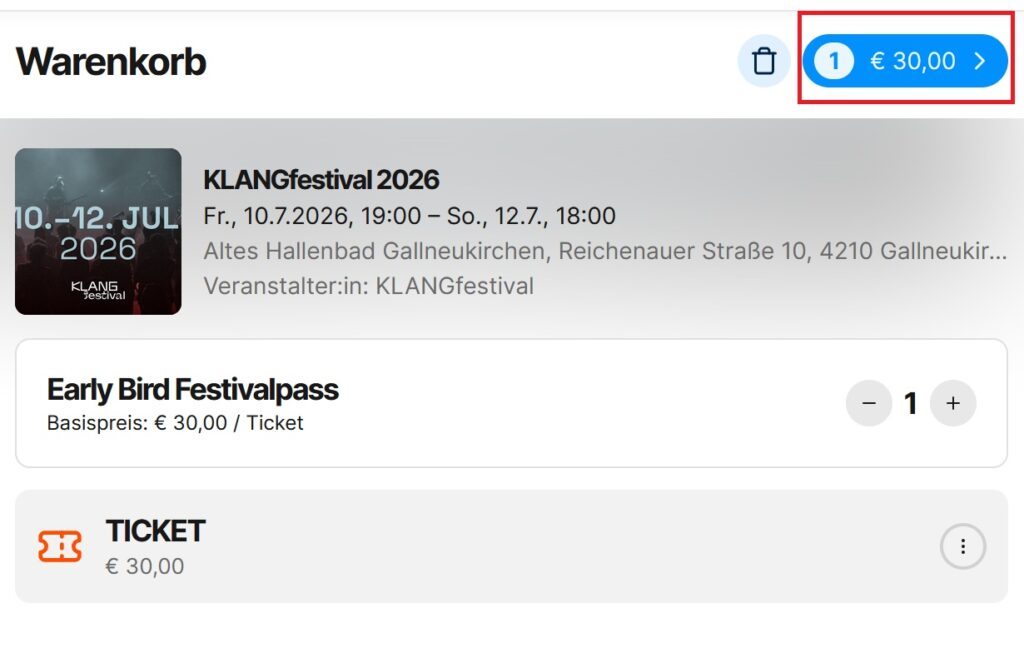
    3) Once you select “to cart”, you can start the payment process in the top right corner:


    4) Now you can choose whether payment is made in cash or by card – you can also book reservations or free tickets here.

    5) After successful payment, the tickets and the invoice are printed automatically on the printer provided.

  • Point of sale – add a register and card terminal

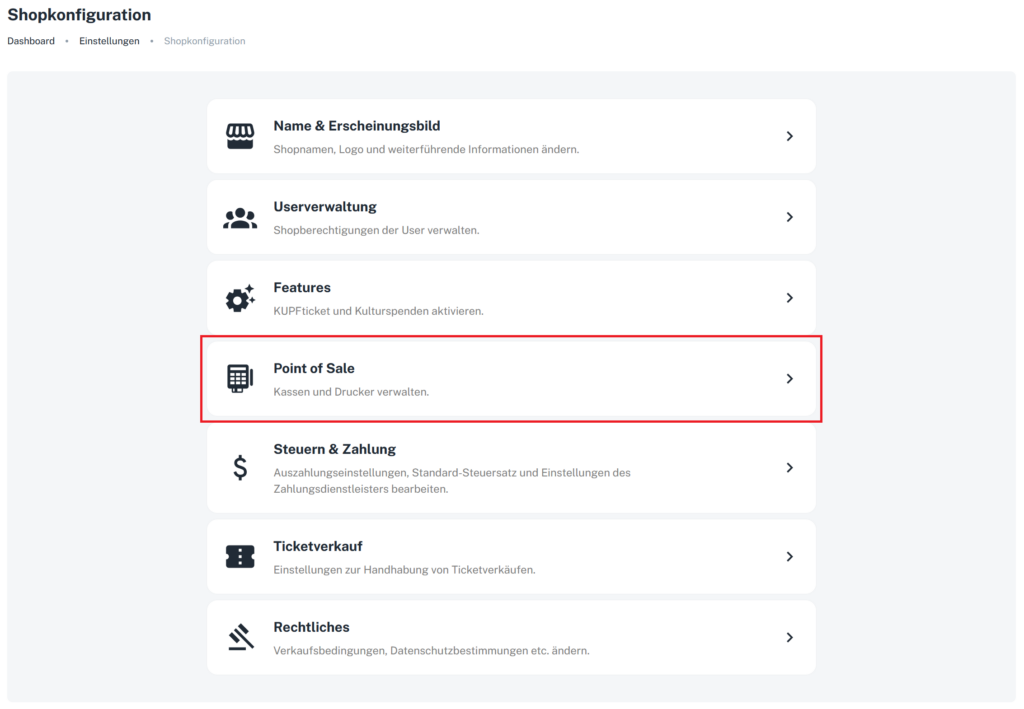
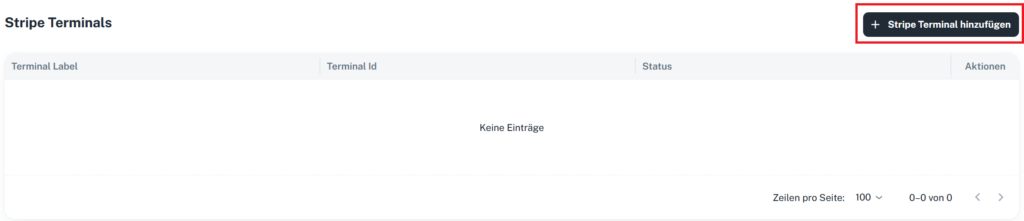
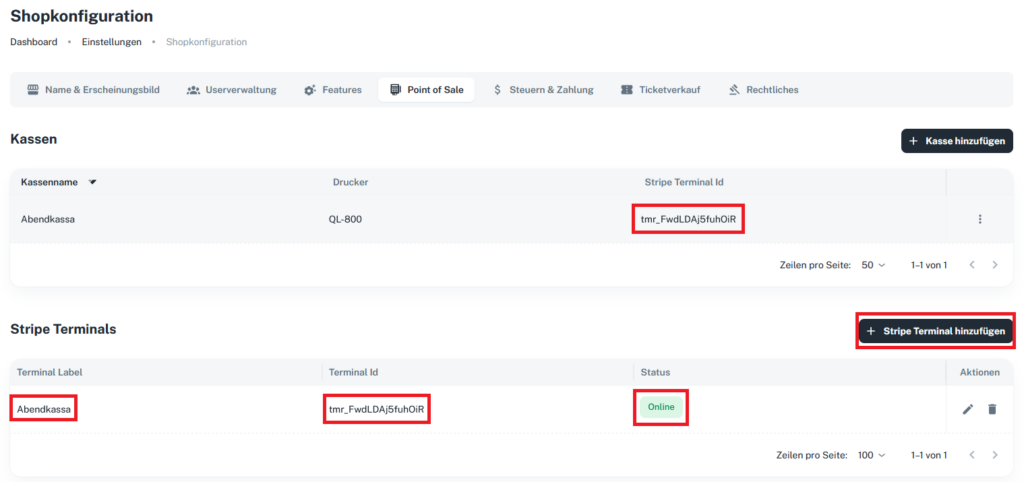
    To accept card payments via the POS as well, you need to add a Stripe terminal in the POS settings. To do so, go to “Shop configuration” in the main menu and select “Point of sale”.

    1) Configure the point of sale

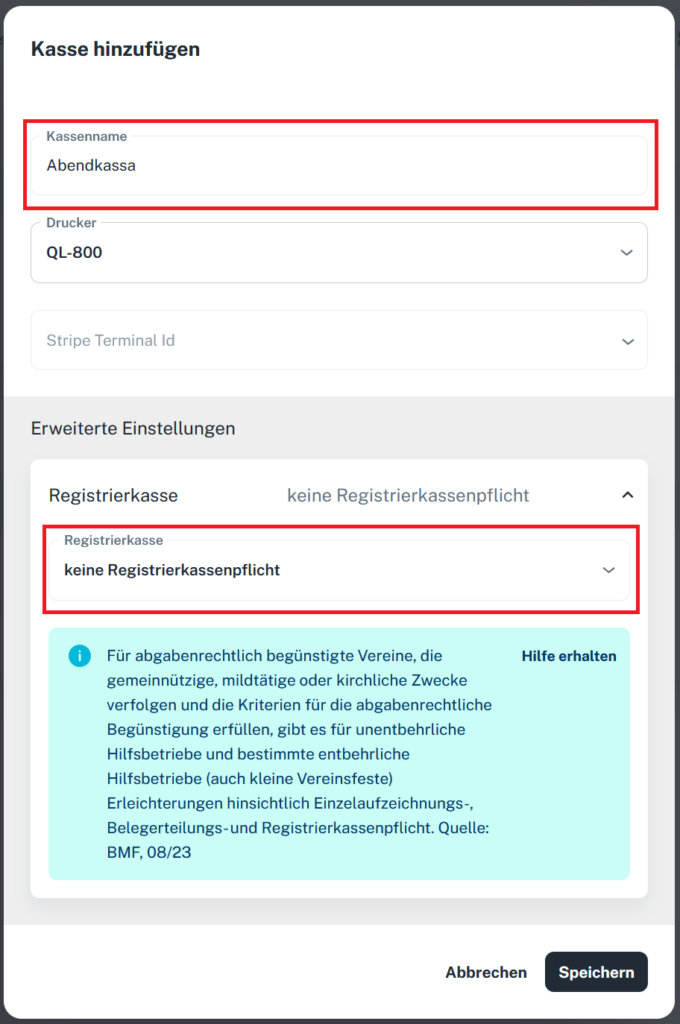
    2) Add a register

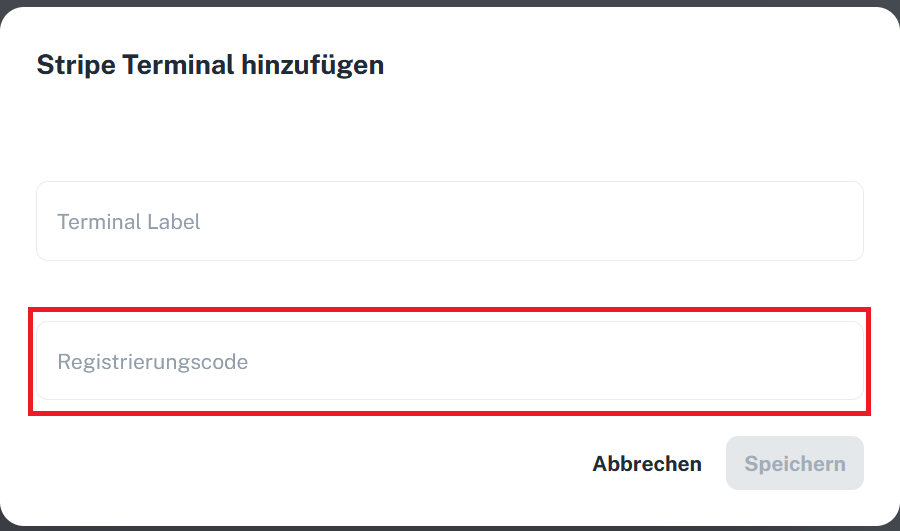
    3) Add a Stripe terminal

    Now switch on the card terminal, connect it to a Wi-Fi network and wait until the registration code appears.

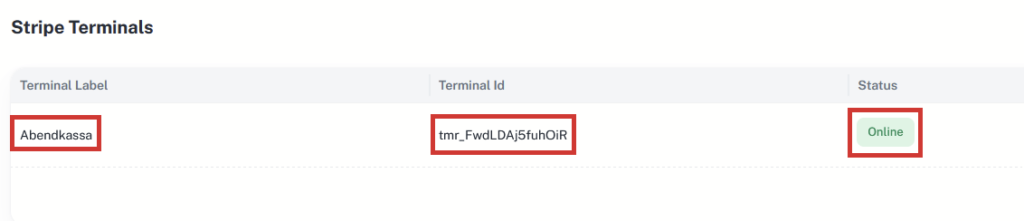
    You can tell whether the terminal is connected to the shop by the status “Online”. Now the Stripe terminal just needs to be linked to the register.

    4) Link register and terminal

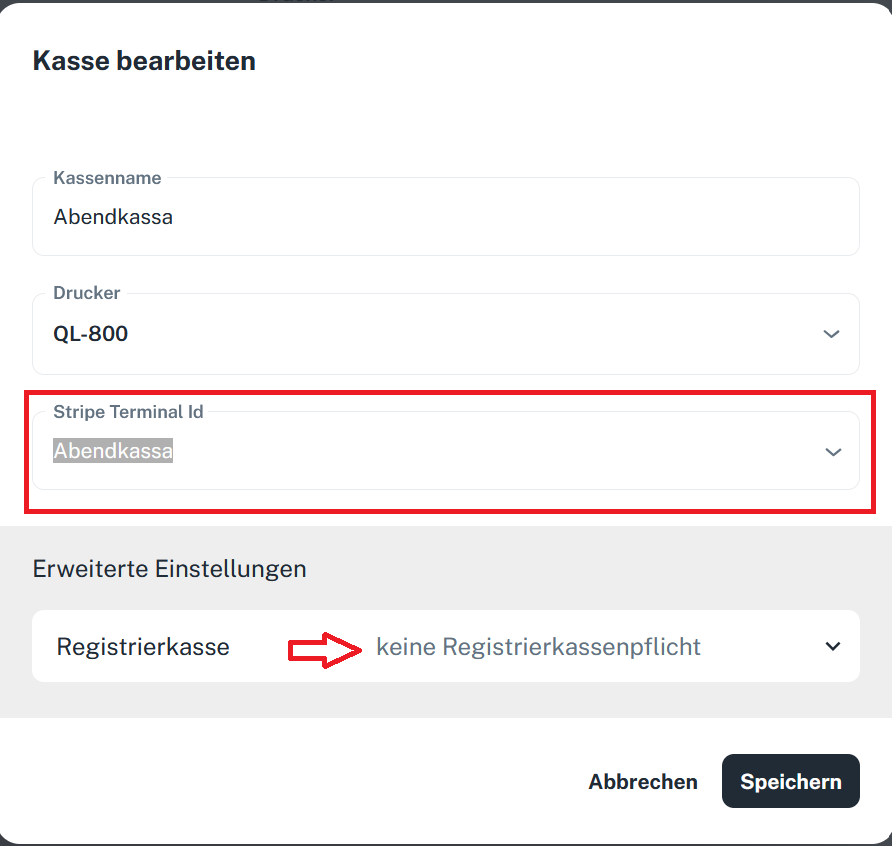
    Open the register’s edit mode by clicking the three dots and then “Edit”.

    Now select the Stripe terminal you created earlier from the dropdown menu.

    Once all settings have been made, the linked Stripe terminal appears next to the register.

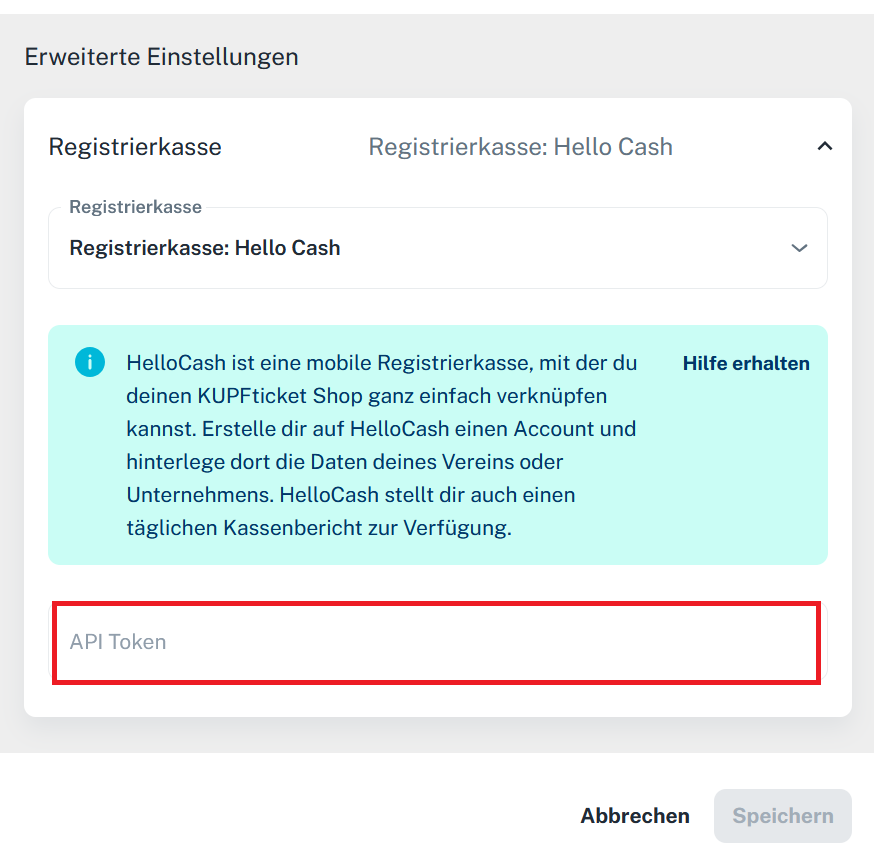
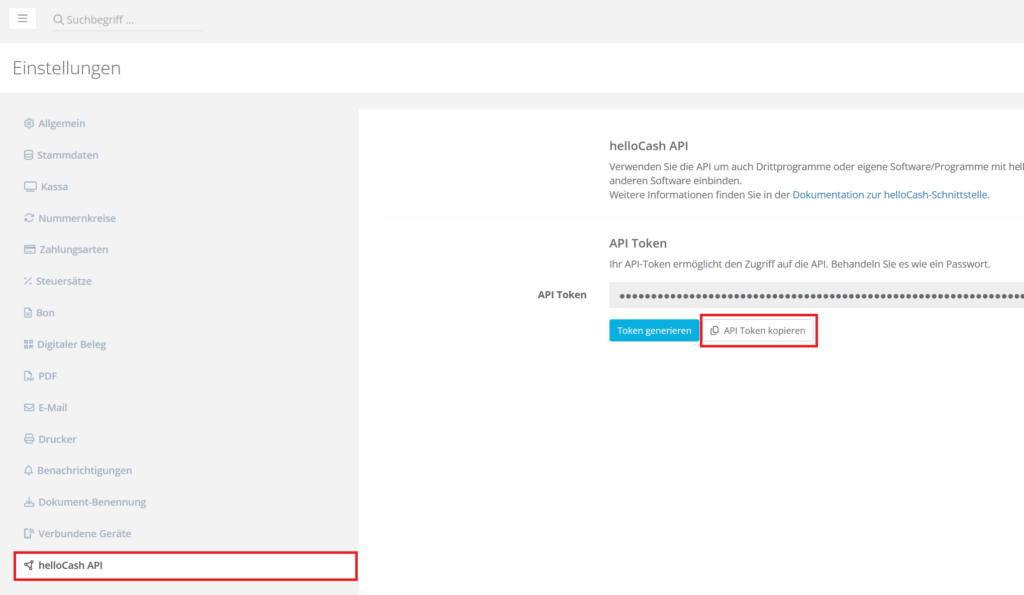
    If you need a cash register integration, you can set this up in the register’s edit mode:

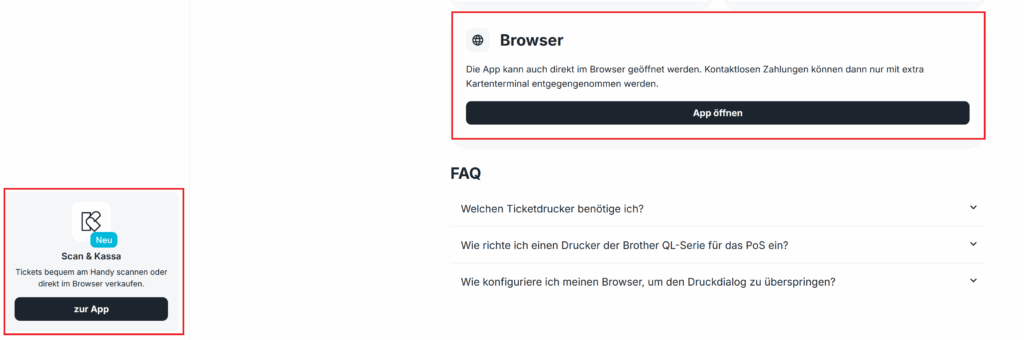
  • Scan & POS app download

    You’ll find the download in the usual app stores from Google and Apple – or directly in your admin area under “Apps“.

    Download now!

  • Point of sale – general info

    If you want to sell tickets on site, you can either use our free app or buy or rent our ticket printer together with a card terminal.

    1) In the point of sale (POS), you can book tickets, create reservations or issue free tickets at any time.

    2) We provide a printer for ticket printing. Ticket printing is currently only possible via the browser, not via the app. We recommend using Chrome.

    3) For card payments, we’re happy to provide you with a brand-new Stripe terminal.

    4) You can open the point of sale directly from the admin area.


    Note: With our modern app, you can sell tickets via “Tap to Pay” directly with your smartphone.

    You’ll find all further settings in the respective entries of our FAQs.