FAQs for shop operators
Do you have questions about using KUPFticket or Kulturspenden.at? Here you'll find all the knowledge our support team has to offer. If you still have questions, you can contact us at any time using the chat feature in the admin panel!
Getting started
We work with the payment service provider STRIPE.
The following organizations are accepted by STRIPE (important!):
- Companies, sole proprietors, partnerships, corporations and non-profit organizations with their registered office and actual business address in Austria.
- Authorized representative: at least 18 years old. Between 13 and 17 only with the written consent of a parent or legal guardian; under 13 not permitted at all.
- Authorized representative: at least 18 years old. Between 13 and 17 only with the written consent of a parent or legal guardian; under 13 not permitted at all.
- Documentation:
- Company register number or ZVR number (Austrian register of associations)
- For self-employed persons: VAT ID or other proof of business
- Austrian, SEPA-enabled business bank account
- Reachable by phone
- Functioning business website.
- Company register number or ZVR number (Austrian register of associations)
- Proof of identity and address (KYC):
- Passport, Austrian ID card, driver’s license, residence permit or alien’s passport; for residents outside Austria, a passport is mandatory.
Excluded
- Any use by private individuals without a registered business or association.
- Legal entities without a registered office in Austria.
- Minors under 13; 13- to 17-year-olds without parental or organizational representation.
- Persons or companies from high-risk jurisdictions (Cuba, Iran, North Korea, Syria, Crimea/Donetsk/Luhansk) or on sanctions lists.
- Business areas on the “Prohibited Businesses” list, including illegal goods, drugs, pornography, gambling, high-risk financial services and arms dealing.
Want to create your first shop on KUPFticket? This guide walks you through the setup step by step.
Our tip: Have the required documents and information at hand and go through the steps in order. We’ve also put together a detailed step-by-step guide to creating and activating your shop (in German).
Onboarding usually takes no more than 15 minutes!
1. Create a shop
Sign in to KUPFticket and create a new shop.
When creating the shop, you’ll be asked for various details about your organization. Fill in all fields completely and correctly.
2. Set up a Stripe account
A Stripe account is required for payment processing. Setup and verification take place directly in our onboarding.
During setup, Stripe asks for various information about your organization and its authorized representatives.
Especially important for associations
For associations, some of Stripe’s questions can be misleading.
In particular, associations should not specify any additional roles for the following questions:
- Owner
- Director
- Board members
If, for example, you specify additional company roles such as “board”, “owner” or “director” for an association, Stripe may classify the organization as a conventional company. As a result, a ZVR extract may no longer be accepted as proof of the organization and Stripe may request additional documents.
For associations, we therefore strongly recommend using our guide to creating and activating your shop (in German). It shows, step by step through Stripe, which details must be provided and which options to select for an association.
3. Specify the authorized representative
For an organization, the responsible person must be specified correctly.
The responsible person must be someone listed as an authorized representative in the ZVR extract (Austrian register of associations) or the company register.
Important: For the responsible person’s private address, enter that person’s actual home address, not the association’s address.
4. Check the organization’s address
Make sure the organization’s address matches the address on your official documentation.
Even seemingly small differences in spelling can lead to follow-up questions during the automated check.
5. Have the required documents ready
Depending on the type of organization and the details provided, Stripe may request proof.
For associations, the current ZVR extract is usually the most relevant document.
Stripe may also request proof of identity or proof of the responsible person’s private address.
Always upload documents in full and clearly legible, and make sure they are still valid and up to date.
6. Complete the Stripe verification
Check all details once more before completing.
If Stripe doesn’t need any further information, the verification is complete.
If Stripe requests additional information or documents, follow the instructions directly in your Stripe account.
Accidentally entered the wrong roles during setup? Then change the details, ideally before uploading further documents. Even if Stripe has already requested additional proof, you can still correct your details.
7. Activate the shop
Once all required details have been provided and the Stripe verification is complete, your shop is active.
Detailed guide for associations
For associations, we recommend completing the setup using our guide “Create and activate your shop” (in German). It explains each step, including the Stripe verification, with screenshots.
You can find logos and icons for your website, poster or social media channels here.
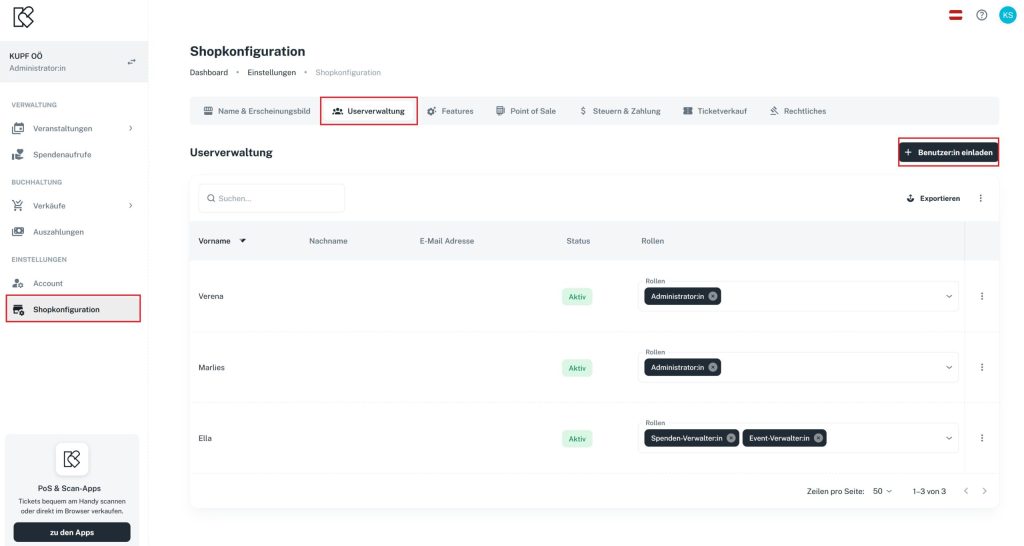
You’ll find user management in the shop configuration. There you can add new users to your shop at any time and assign them the appropriate roles.
| Role | Permissions |
|---|---|
| Administrator | Can change all settings and has all rights |
| Event manager | Can change all settings except the shop metadata |
| Billing manager | Can view invoices and issue refunds |
| Box office manager | Can use the POS (point of sale) for on-site sales |
| Check-in manager | Can use the scan function in the app |
Note: The account used to create the shop is the so-called super admin (shop owner) and doesn’t need an additional role. If you want to change the shop owner, please get in touch with us.
Events
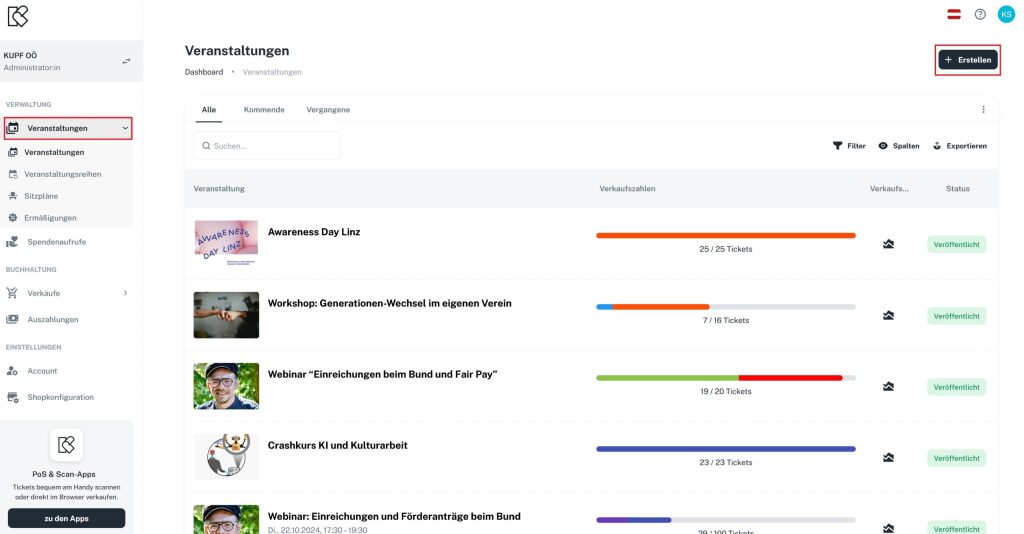
Create an event
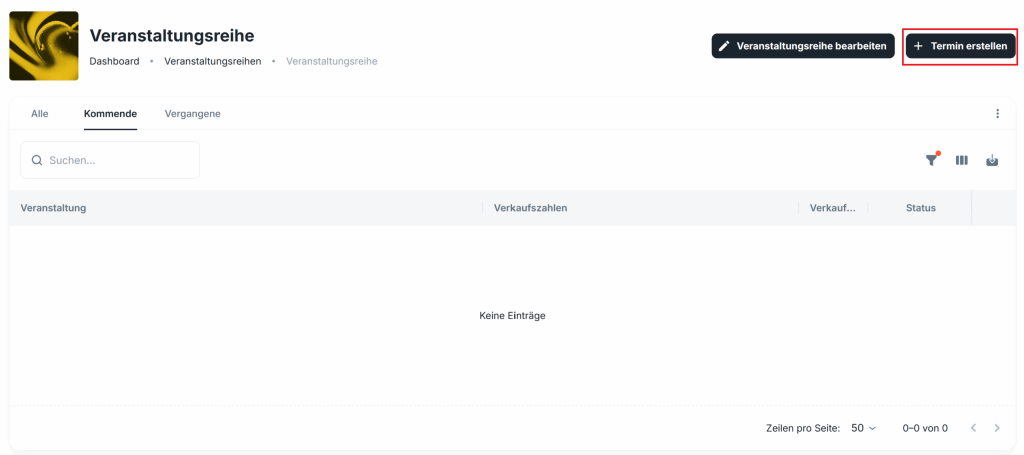
In the main menu on the left, you’ll find the entry “Events”. In the top right corner, you can create a new event with “+Create”.
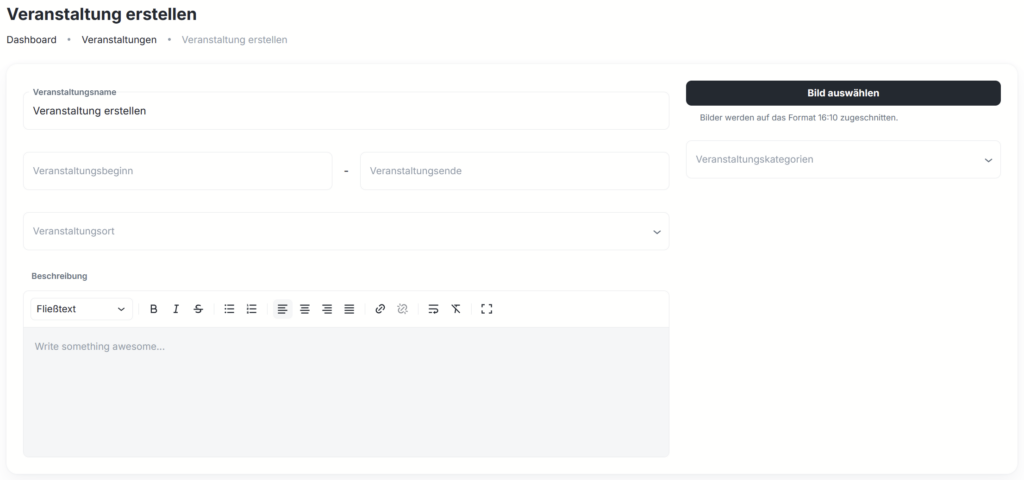
In the event editor, you can create your event and edit it at any time: enter the event name, upload an image, define the event period, set the venue and add an event description.
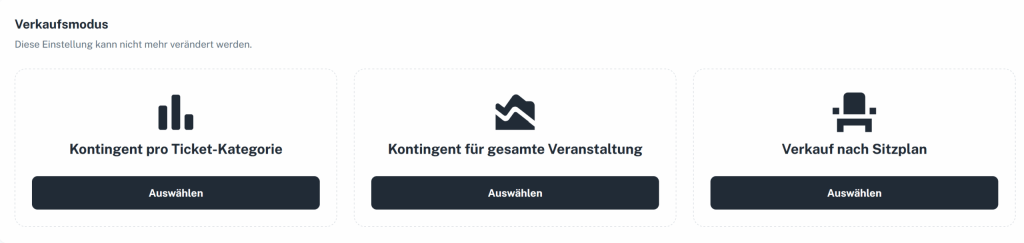
In the next step, you choose the sales mode.
Add a venue
Venues that don’t appear in the search (because they aren’t listed on OpenStreetMap) can now be added and saved by you.
You can create and edit venues directly within events and event series.
Venues no longer have to be added anew every time – they remain permanently saved.

Select event categories
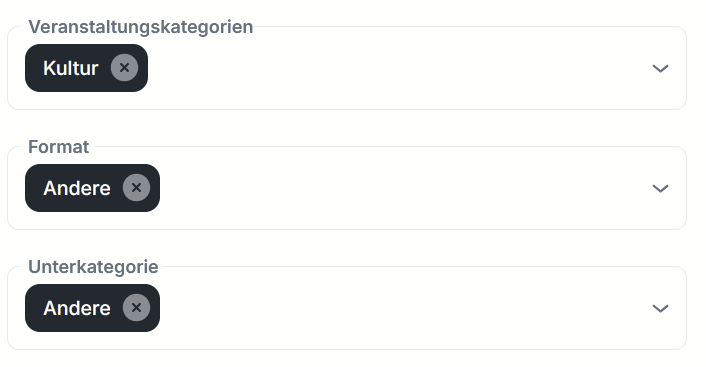
When creating new events, you can now select suitable main and sub-categories. A total of five main categories with their respective sub-categories are available.
Once enough events have been categorized, we can integrate a search and filter function into the web shop and, in the future, also recommend similar events to buyers. That means more visibility for your events.

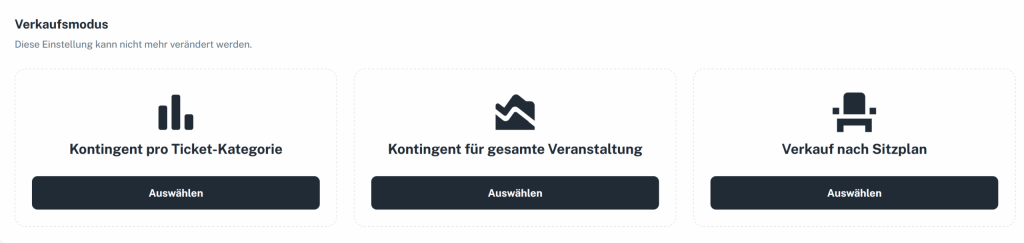
When creating events, you can choose from three options:
1) “Allotment per ticket category”: Here you can set the allotments per ticket category yourself and adjust them manually at any time.
2) “Allotment for the entire event”: Here you can define an overall allotment for the entire event.
3) “Sale by seating chart”: With the seating chart option, the ticket allotment depends on the seating plan.
Tickets & ticket sales
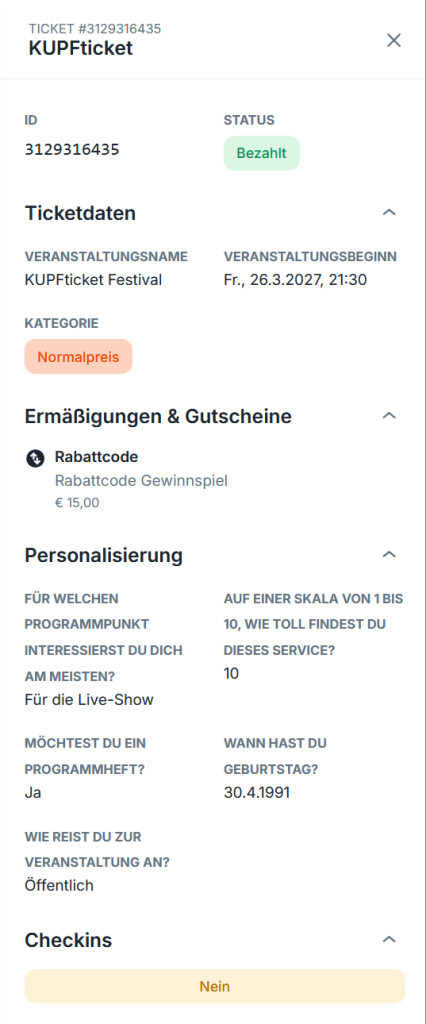
When creating or editing a ticket category, you can enable various fields for ticket personalization:
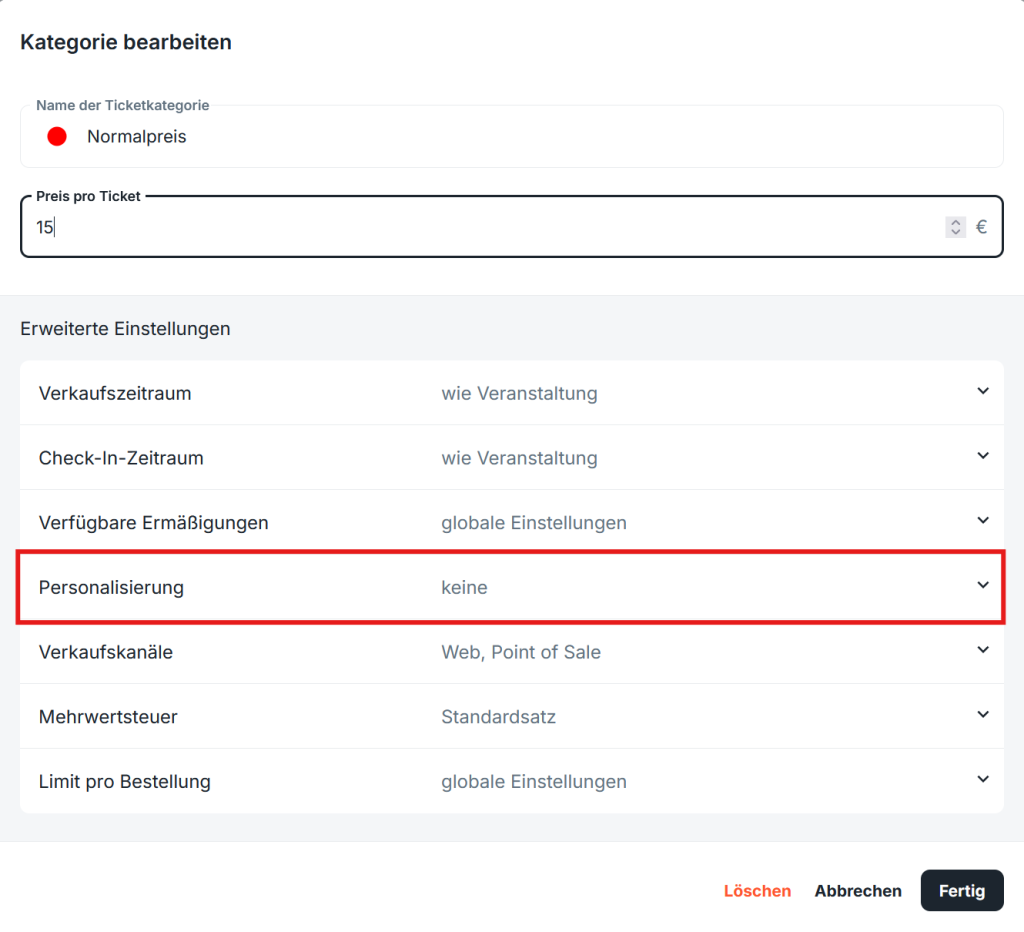
By default, buyers always have to provide an email address and a name for the order. Ticket personalization is useful when you want to collect additional information:
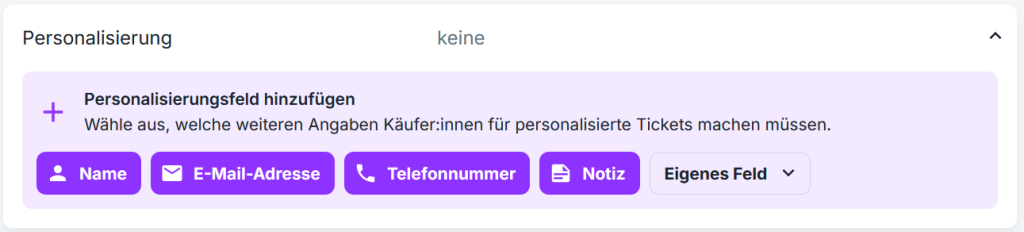
- Name of the ticket holder
- Email address of the ticket holder
- Phone number
- Notes field (optional)
- Custom field
Custom field
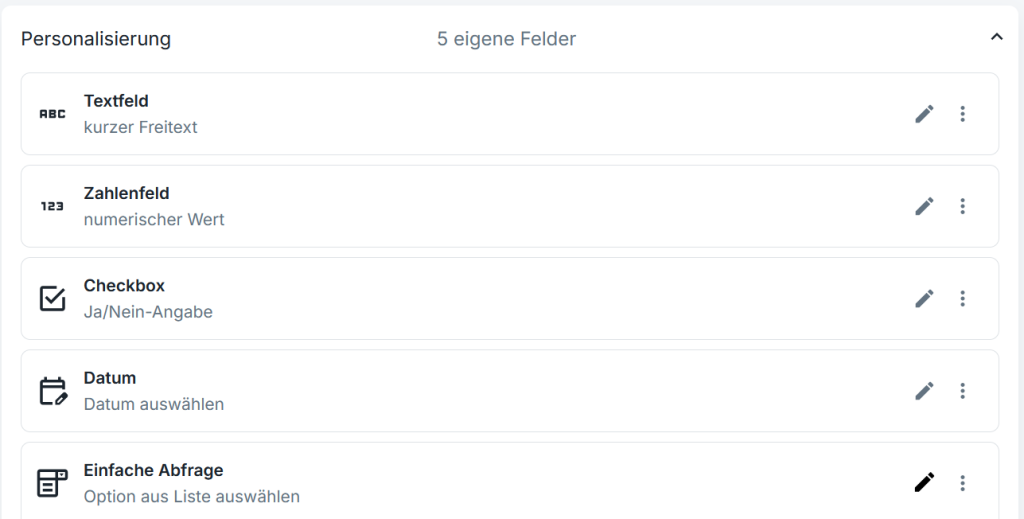
- You can define custom fields individually
- Text fields
- Number fields
- Date picker
- Checkboxes
- Simple questions
- Every new field can be defined as required or optional
Input mask
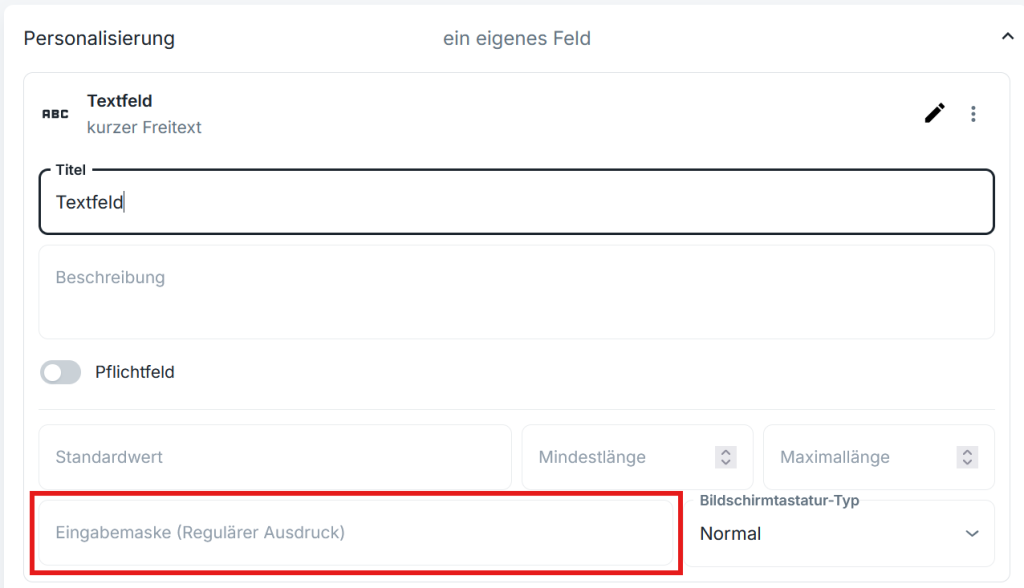
In the input mask, you can define a so-called pattern. You can find the details here.
For example:
[a-z] if only lowercase letters should be valid
[a-z] {4-8} if four to eight characters (lowercase letters) should be requested
[0-9] {4] if four digits should be requested
In the event editor, you can create ticket categories and edit them at any time. Among other things, you can set the sales period and the check-in period, select available discounts, and enable or disable the sales channels web and POS.
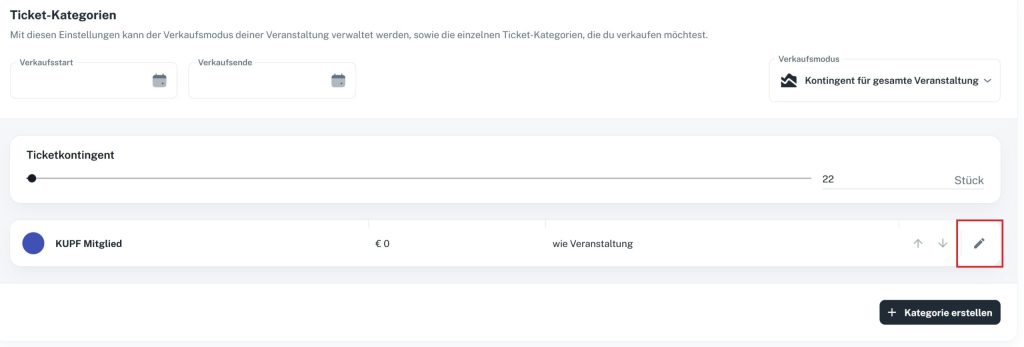
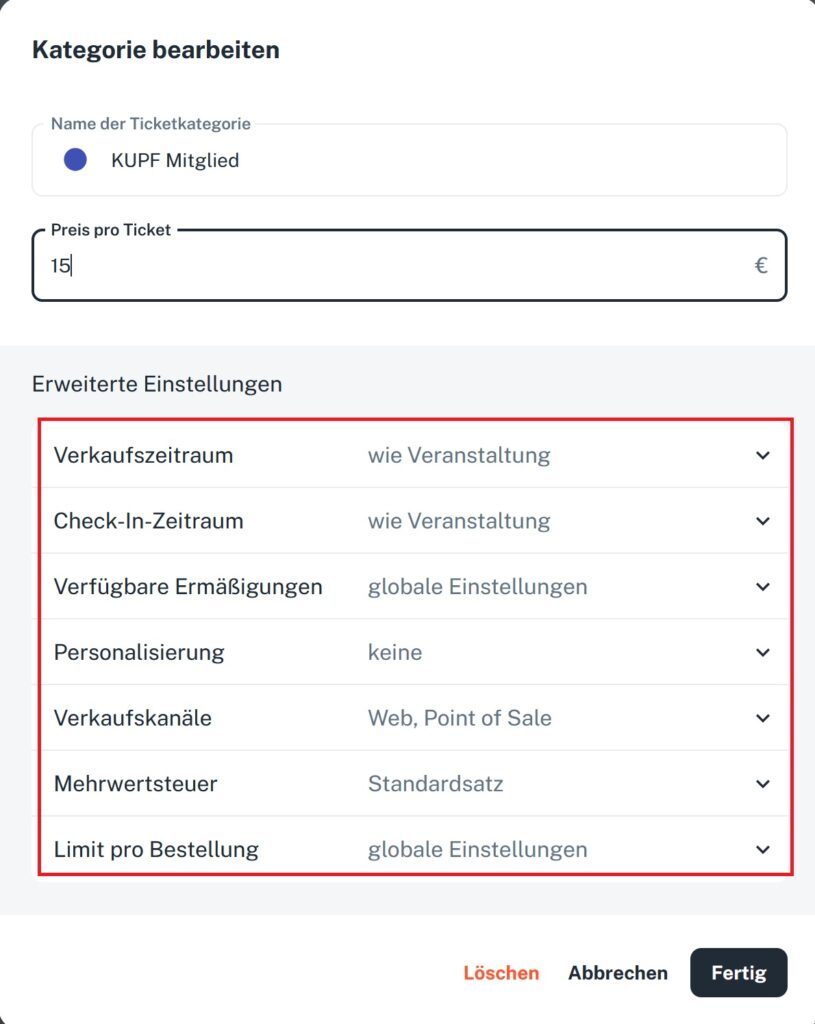
To enter edit mode, click the pencil icon directly on the ticket category (see screenshot). In the category’s advanced settings, you’ll find useful tools to fine-tune the sales of your event:
Under “Shop configuration” -> “Ticket sales”, you can set a maximum number of tickets per order for your shop:
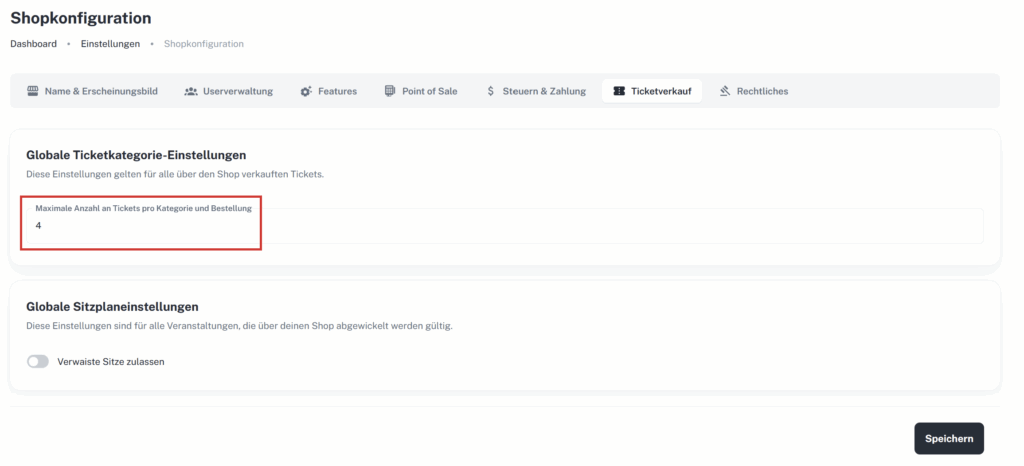
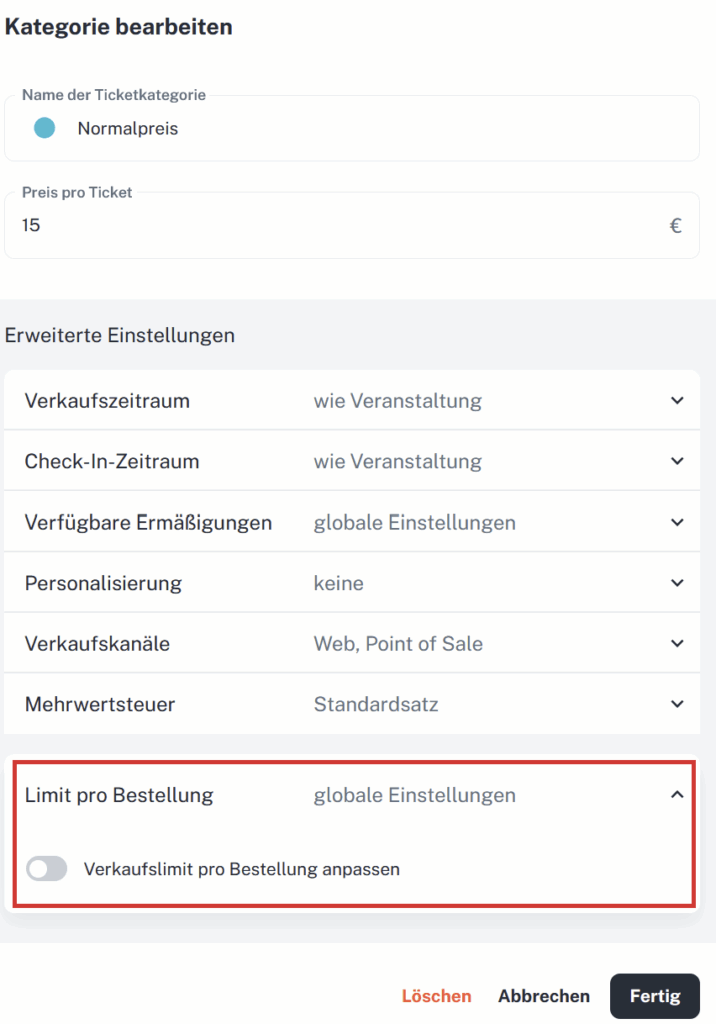
You can also adjust the limit in the advanced settings of a ticket category. This setting applies only to that category and overrides the global shop limit.
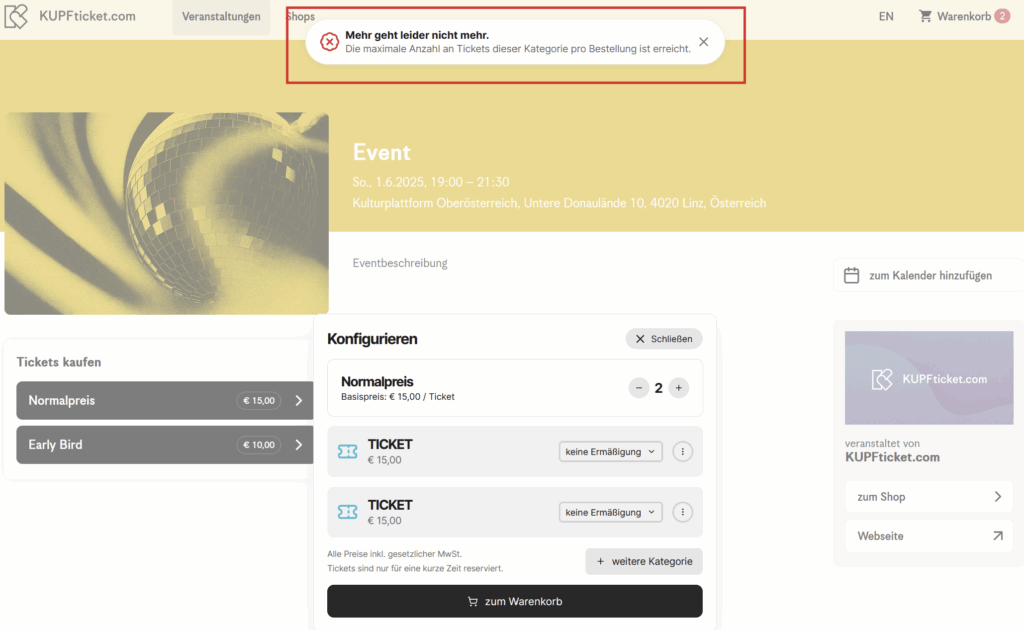
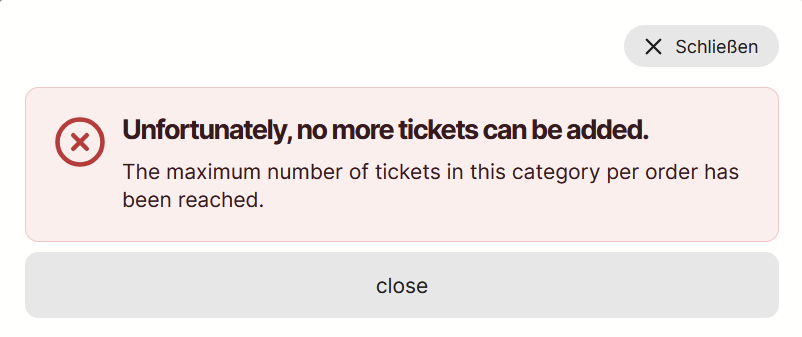
When buyers reach the limit in the shopping cart, an info popup appears:
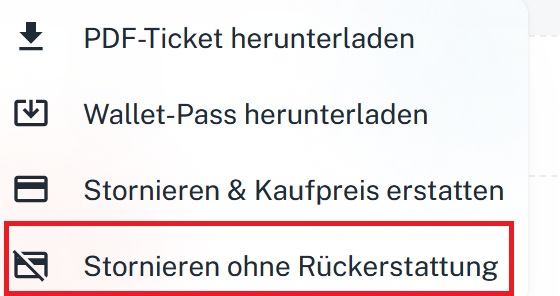
KUPFticket currently offers several ways to issue complimentary tickets. Which option is suitable depends on where the free tickets are to be issued, whether specific seats are assigned, and how the tickets are to be evaluated later on.
Overview
| Option | Suitable for | Issued via | Evaluation |
|---|---|---|---|
| “Confirm without payment” | general admission and reserved-seat tickets | Point of sale | Filter by payment method |
| €0 ticket category | your own free ticket categories, e.g. general admission tickets | Point of sale | Filter by ticket category |
| 100% discount code | free tickets via the web shop | Web shop and point of sale | Web shop: “Free”; point of sale: filter by discount |
| POS category with 100% discount | reserved-seat tickets via the seating chart | Point of sale | Filter by €0 tickets |
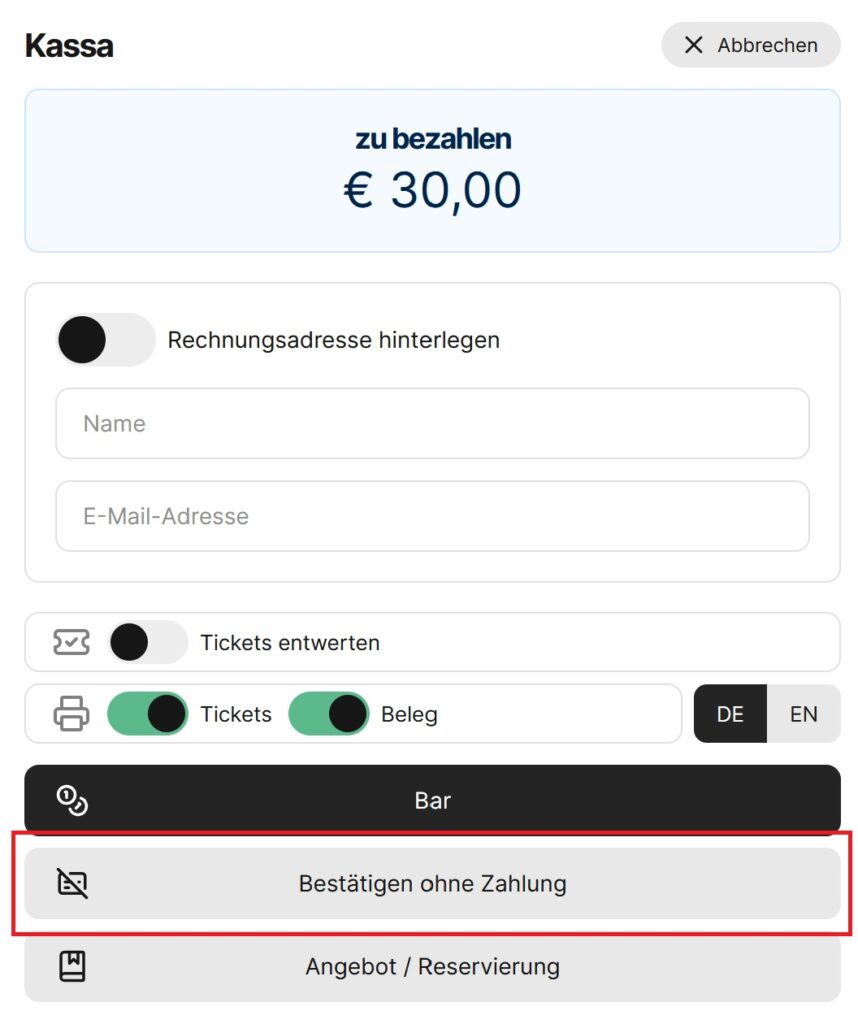
1. “Confirm without payment” in the point of sale
In the point of sale, you can select “Confirm without payment” when selling.
A valid ticket is created, but no payment is recorded. The ticket therefore does not appear as revenue in the settlement. In the ticket list, you can filter by the payment method “Confirm without payment”.
This option is suitable, for example, for general admission and reserved-seat tickets when a ticket is to be issued free of charge and no separate free-ticket statistics are needed in the settlement.
2. Your own €0 ticket category for the point of sale
Another option is to create your own €0 ticket category. This category can be set up so that it is only available via the point of sale and not offered in the web shop.
To do so, go to the ticket category under “Edit category” → “Advanced settings” and disable the option “Sell via web”.
When selling via the point of sale, you can then select this €0 ticket category.
The tickets are created with a price of €0. In the settlement and statistics, however, they are currently not shown as a separate “free ticket” category. In the ticket list, the tickets can be filtered by the respective ticket category.
This option is suitable, for example, for general admission tickets where the main purpose is to record the number of tickets issued.
3. Discount code with 100% discount
Alternatively, you can create a discount code with a 100% discount.
When this discount code is used during a sale in the point of sale or in the web shop, the ticket price is reduced in full and the ticket is issued free of charge.
This option is particularly suitable for free tickets that are to be issued via the web shop. Tickets issued this way are shown as “Free” in the evaluation.
Tickets booked in the point of sale can be filtered in the ticket list via the “Discount” column.
4. Your own POS category with a fixed 100% discount
If free tickets are to be assigned to specific seats in the seating chart, you can create a separate POS category with a fixed discount of 100%.
When selling, first select the desired seat directly in the seating chart. Then select the corresponding POS category with the stored 100% discount. The regular ticket price is automatically reduced to €0.
The tickets issued can then be filtered as €0 tickets in the ticket list.
In the settlement and statistics, however, these tickets are currently not shown as a separate “free ticket” category.
This option is particularly suitable for free tickets with fixed seats, where seats are to be assigned via the seating chart.
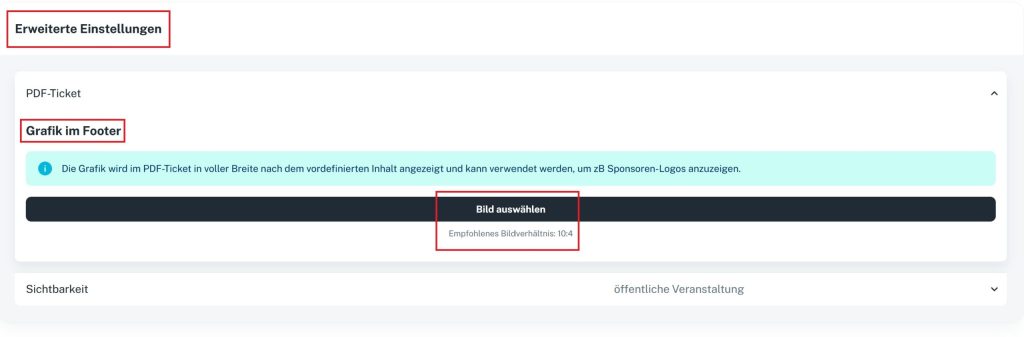
The ticket layout is standardized. Your shop and event images give the ticket an individual touch. In the event editor, you can also upload a second image that designs the lower part of the ticket.
This is also where you can add further information, e.g. if the ticket is valid as a public transport ticket. Or if you need a logo bar on the ticket, you can add it at any time with this option.
Under “Edit event”, you’ll find the following option at the very bottom:
Add discounts
In the main menu under “Events” – “Discounts”, you can set up fixed discounts and create promo codes.
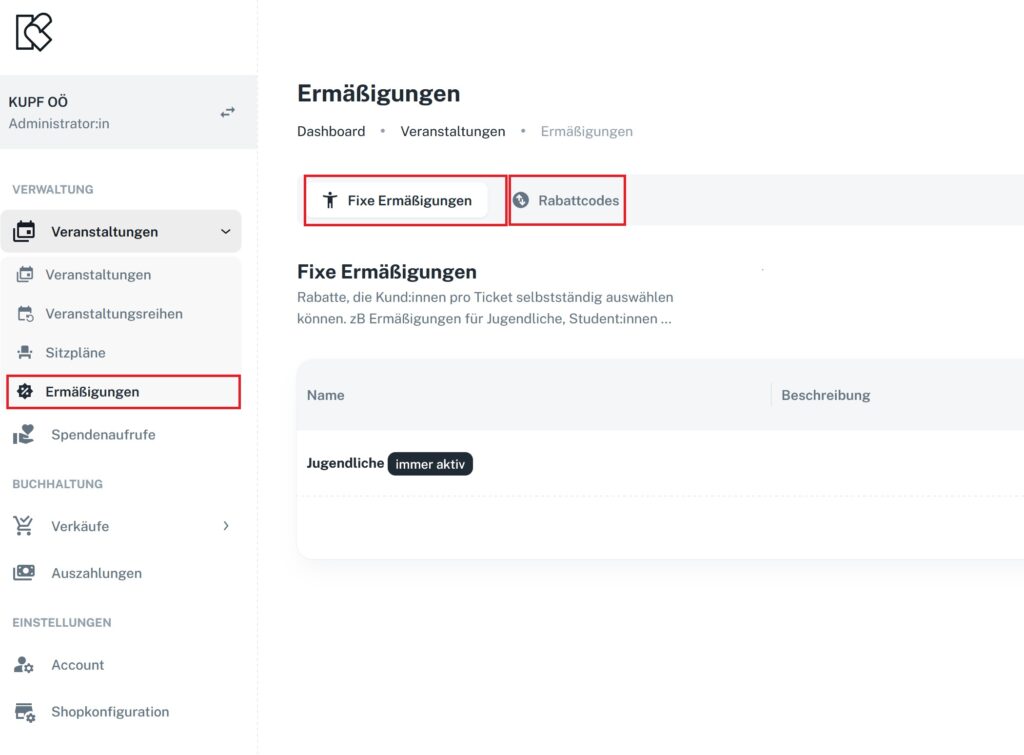
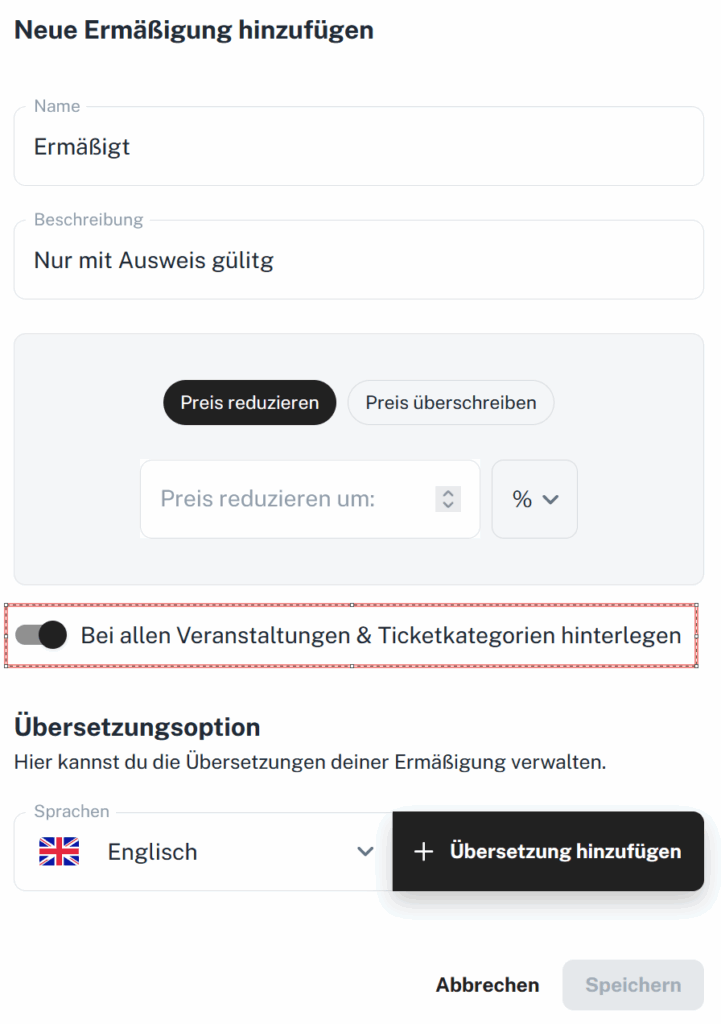
Global discounts are available for all events and categories. You can create a global discount with the toggle “Apply to all events & ticket categories”. If you turn the toggle off, you can include the discount for selected categories in the advanced settings.
Conditions
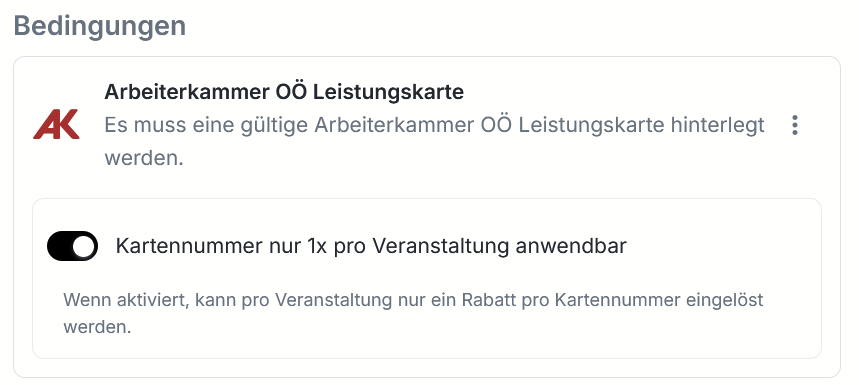
Upper Austrian Chamber of Labor (AK OÖ) benefits card
With fixed discounts, you can now also integrate the benefits card (Leistungskarte) of the Upper Austrian Chamber of Labor.
When buying a ticket, the card number is validated live and the discount is applied automatically.
Please note: this feature is currently only available to benefits card holders from Upper Austria.
Age verification
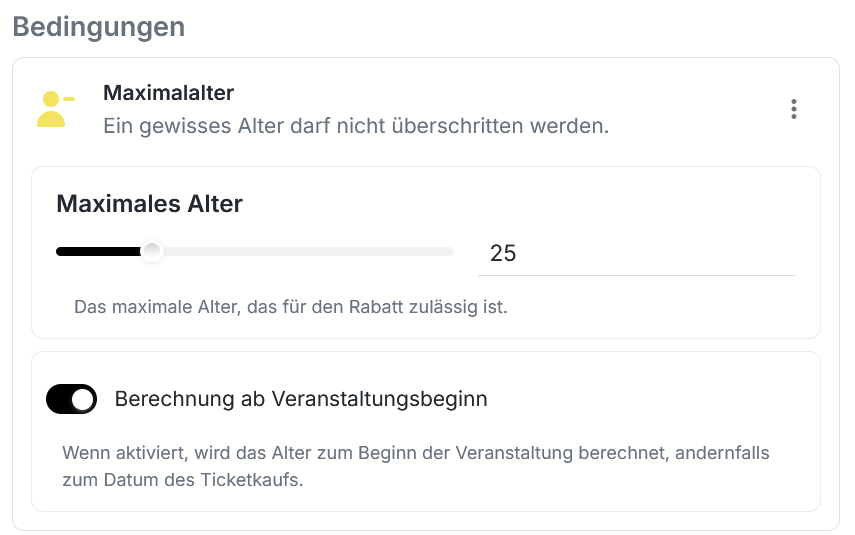
When buying a ticket, the buyer’s age is requested and the discount is applied automatically.
You can define any maximum age. When purchasing, buyers confirm their date of birth.
This is particularly handy for youth discounts.
Create promo codes
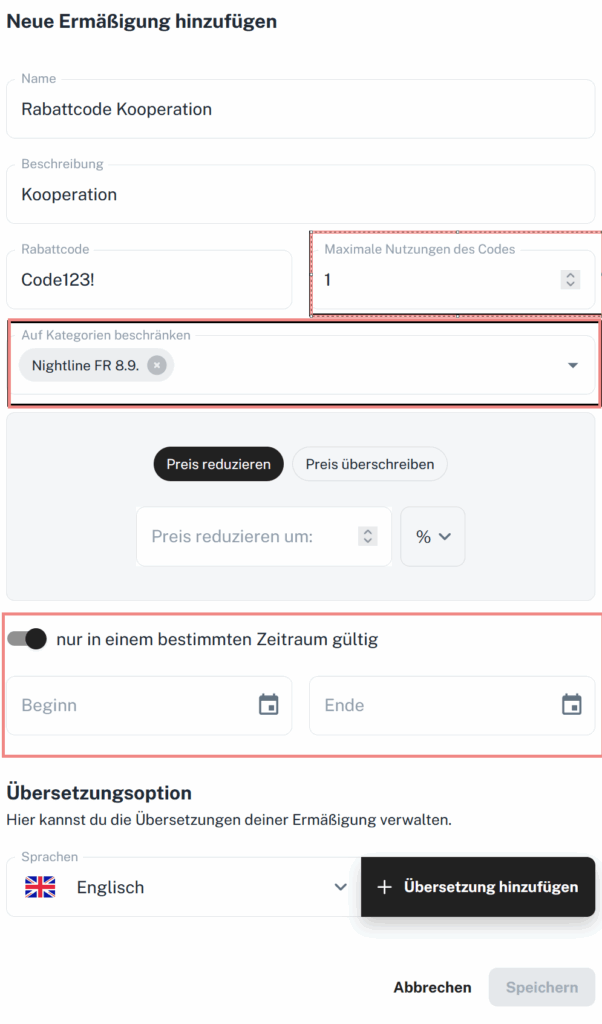
With promo codes, you can define the validity period and the number of times the code can be used. You can also restrict promo codes to individual categories.
Payments & payouts
Customers can pay on KUPFticket with a wide range of common payment methods. The following are currently supported:
- Debit card
- Credit card
- EPS online bank transfer
- Apple Pay
- Google Pay
- Wero
- Link
Organizers do not incur any additional fees, regardless of the payment method chosen.
Please note that the availability of individual payment methods may vary depending on the buyer’s country, device or browser. If the requirements are met, the available payment methods are shown automatically at checkout.
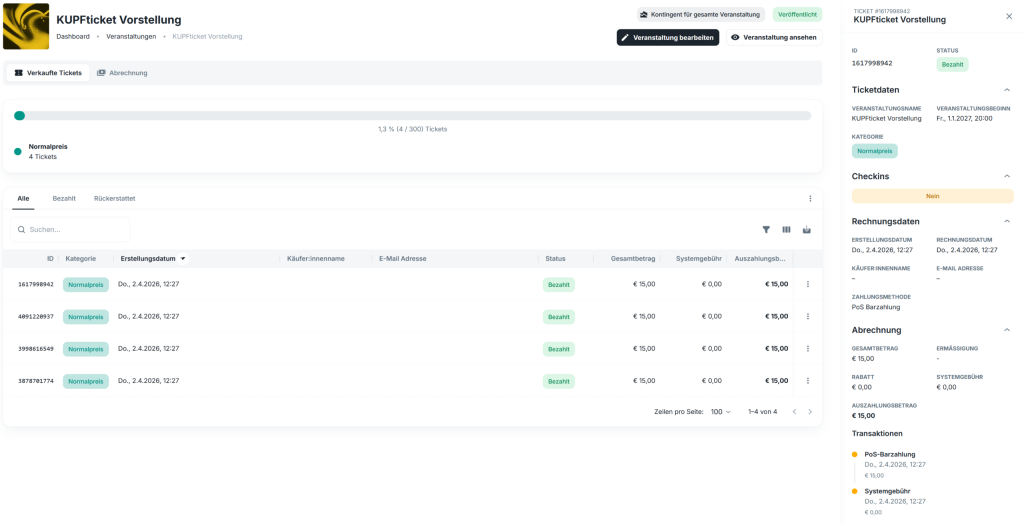
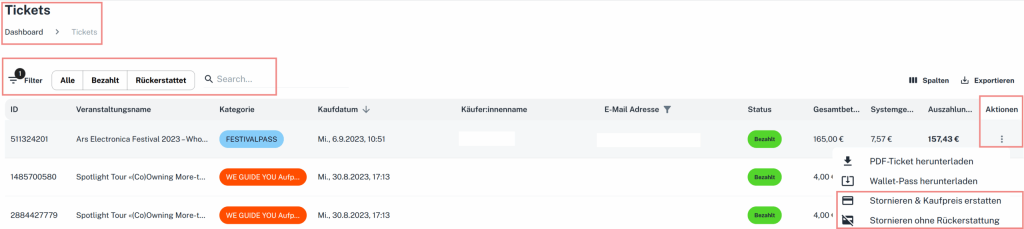
In the admin area under Events, you can view the sales figures of every event you’ve created in detail:
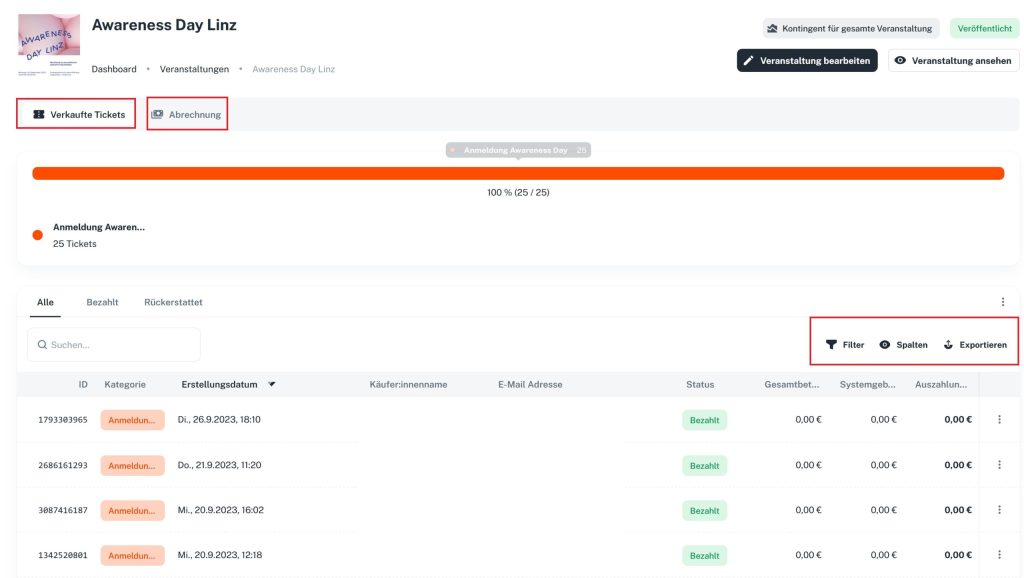
- Under Filter, you can filter the data by various criteria. You can also apply several filters at once.
- Under Columns, you can expand the column view as needed to display key categories.
- Quick buttons:
- All includes paid, canceled and refunded tickets.
- Paid includes only paid tickets – canceled and refunded tickets are not included.
- Refunded includes only refunded tickets – canceled tickets are not included.
- All includes paid, canceled and refunded tickets.
Once you have the data you need, you can download the list via Export either as a PDF document or as a CSV file.
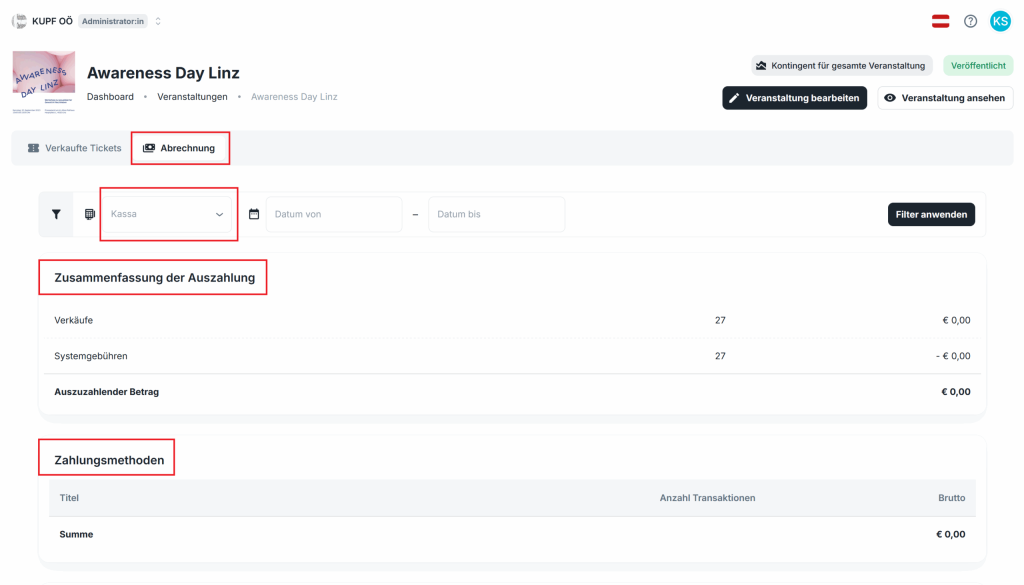
Under Settlement, you’ll find the payout summary and all details on the payment methods used.
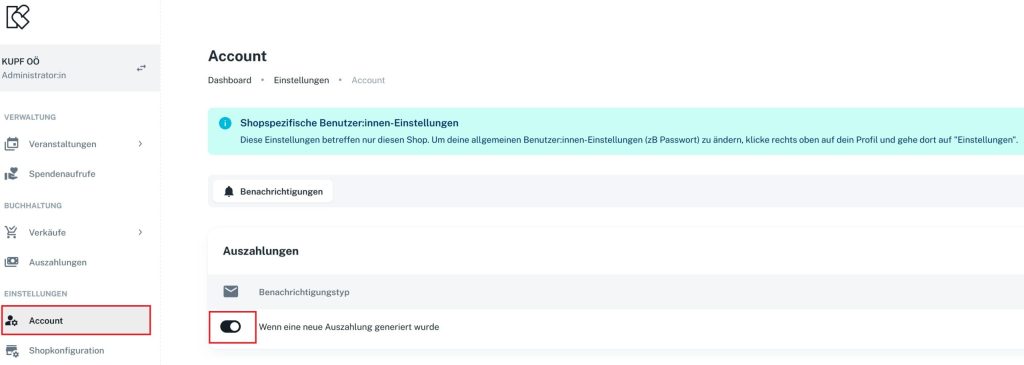
With our payout system, you decide when and how you receive your ticket revenue.
Whether collected after the event ends, at regular intervals or immediately via instant payout – you can freely choose the payout interval at any time in the settings under Shop configuration -> Taxes & payment.
In the Settlements section, you can check at any time when the next payout will be triggered. You’ll also find the option to pay out money immediately (instant payouts) there. All invoices and payout statements are available for download there.
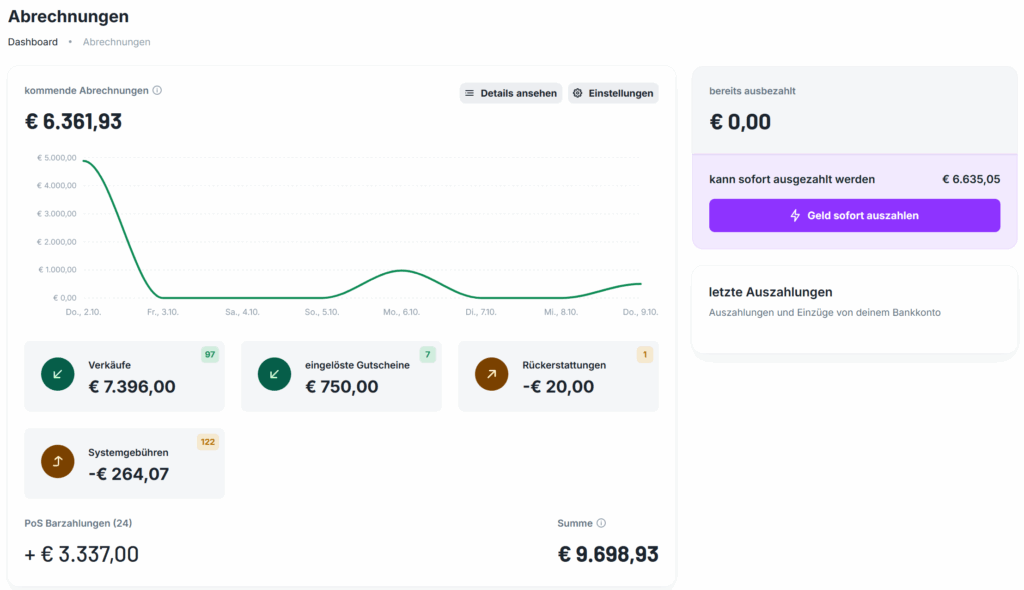
In the settings, you can choose between our two payout models at any time.
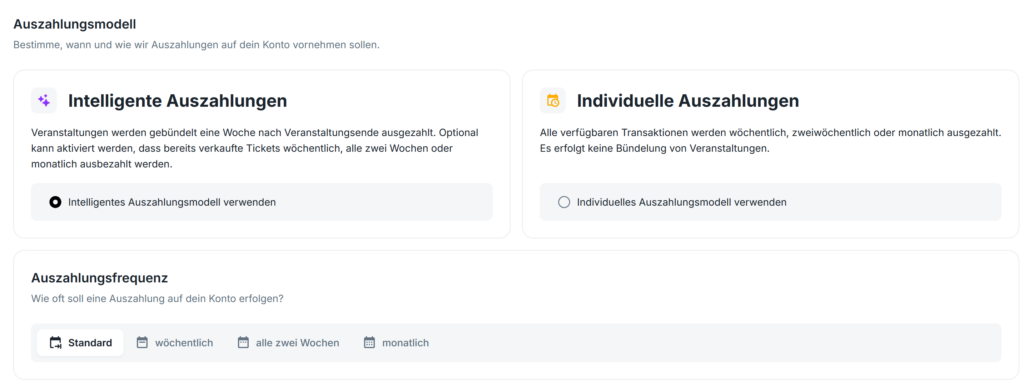
Our payout models
1) Smart payouts
Standard
The revenue from an event is usually paid out in full approximately 8 days after the event ends.
Note: Partial payouts may occur beforehand (see exceptions*). The advantage: with this payout frequency, the entire event is settled and paid out 8 days after it ends.
*Exceptions
1) If ticket revenue has been held in your Stripe account for 80 days, the payment provider is obliged to pay it out early. This can result in several payouts per event.
2) If an event has already been running for more than two weeks and is also still more than two weeks away from ending, payouts are made weekly. Typical example: museums.
Weekly, fortnightly or monthly
Ticket revenue per event can also be paid out in bundles weekly, fortnightly or monthly.
Note: With a busy event program, this model results in a large number of payouts and settlement statements.
2) Custom payouts
All available revenue is collected and paid out at a fixed interval regardless of individual events — weekly, fortnightly or monthly.
Note: Recommended for organizers who want to simplify their accounting.
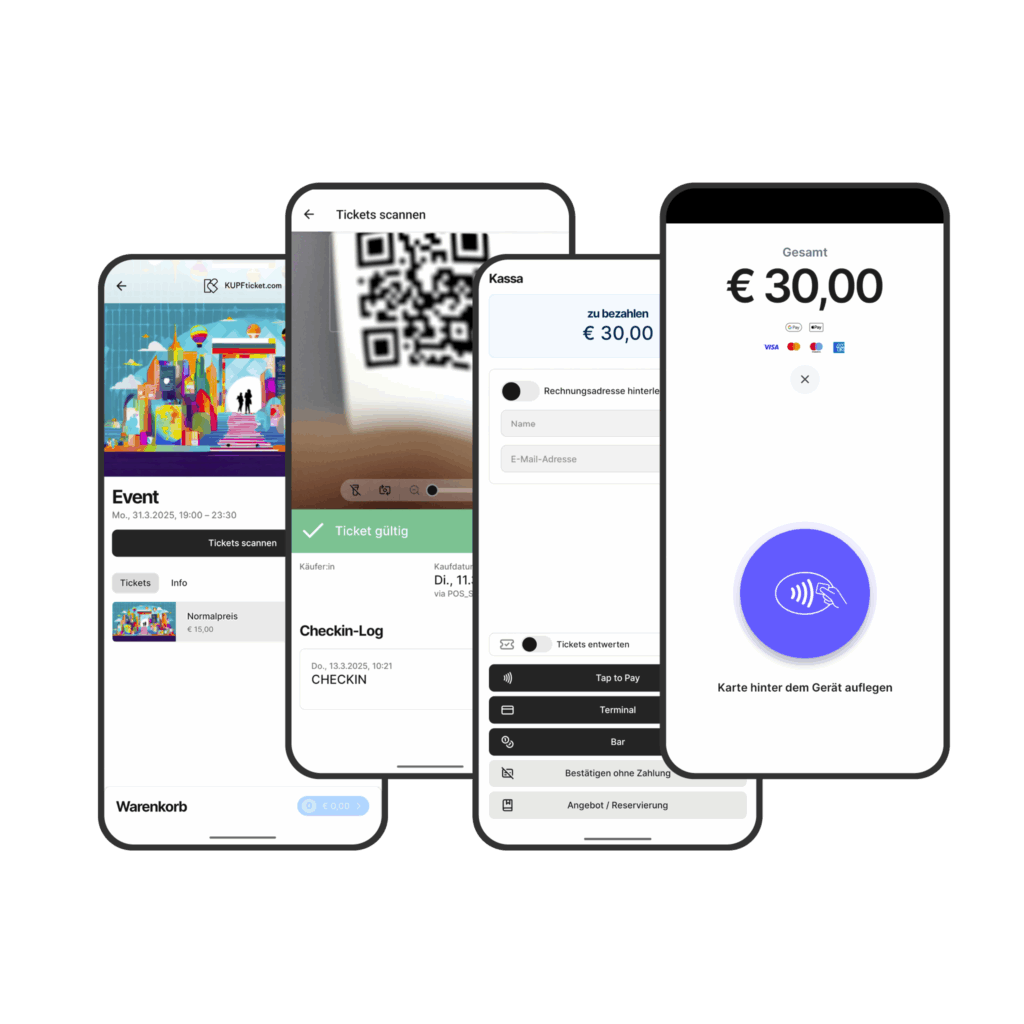
Scan & POS app, point of sale & Tap to Pay
You can enable the feature directly in the app. If you run into problems, you can check the payment provider’s list to see whether your smartphone is supported:
Simply sign in to the app with your KUPFticket.com login details to get access to your shop:
✔ Now you can sell tickets and vouchers and accept donations directly in the app:
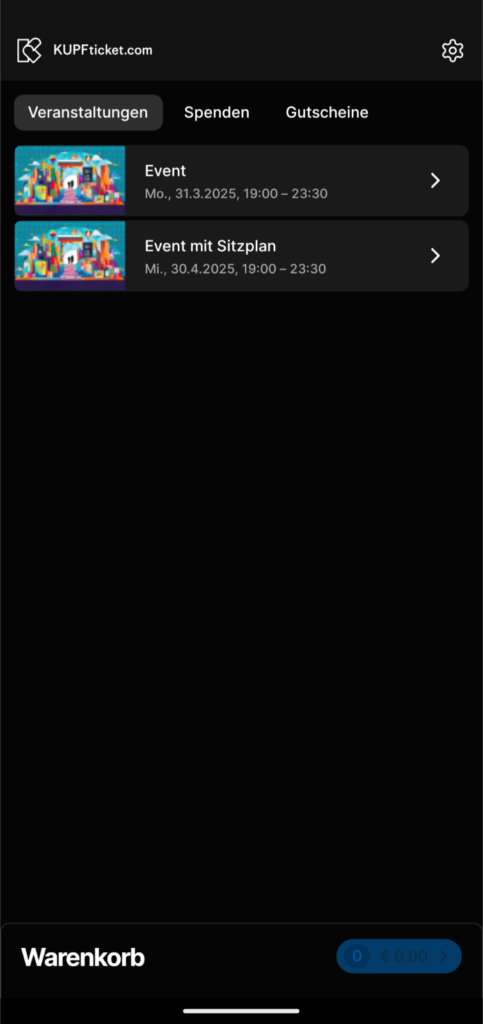
✔ Convenient shopping cart handling
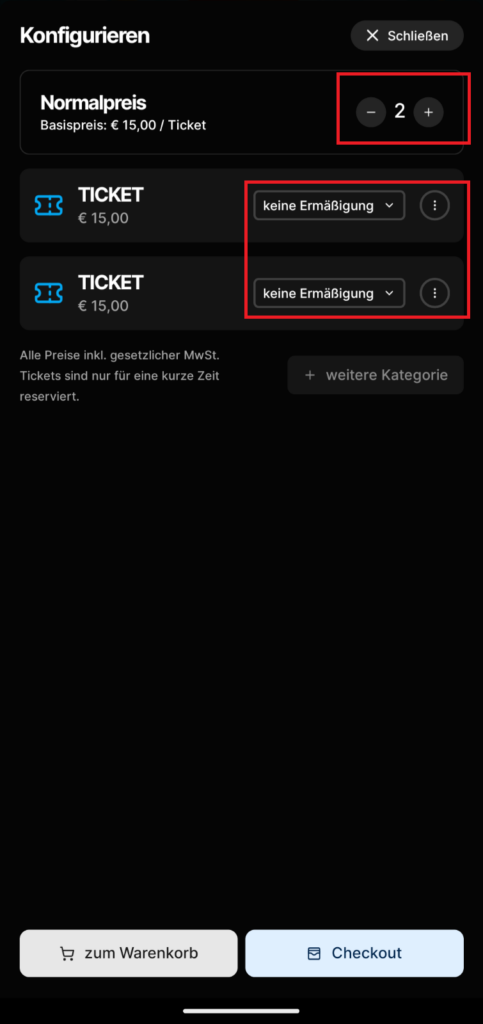
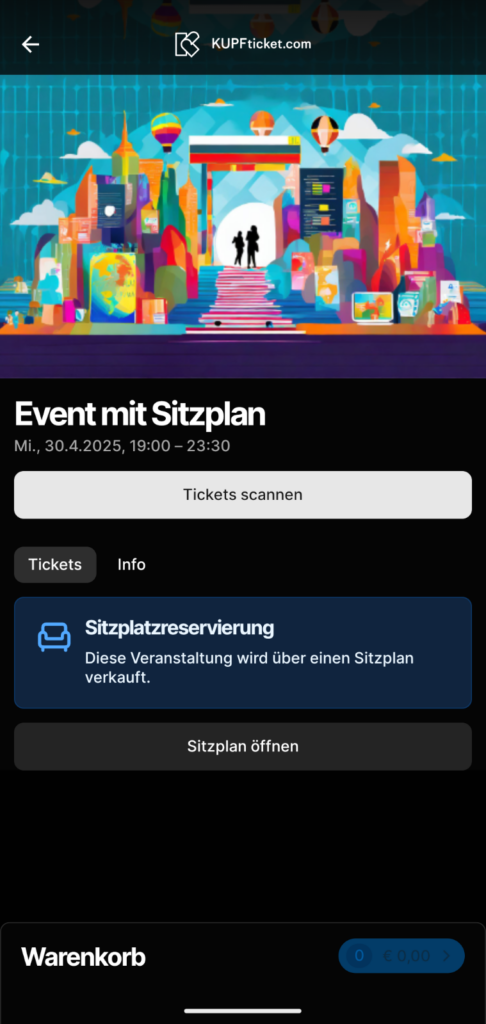
✔ With the app, you can sell general admission tickets and reserved-seat tickets:
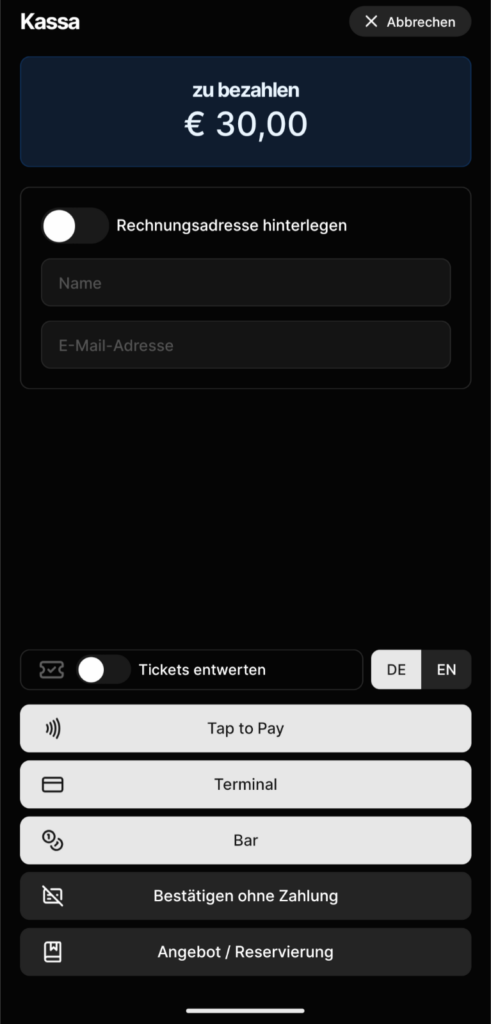
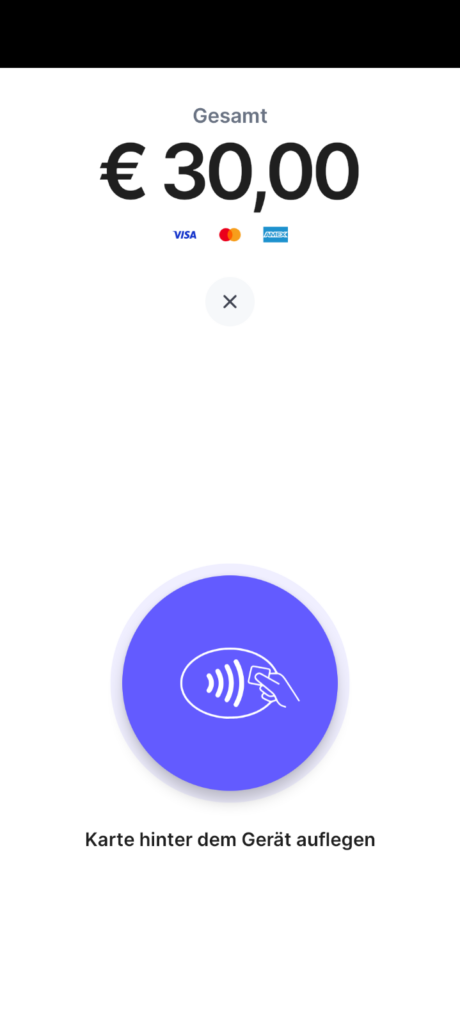
✔ Easy ticket sales with the Tap to Pay feature work with debit cards, credit cards as well as Google Pay and Apple Pay:
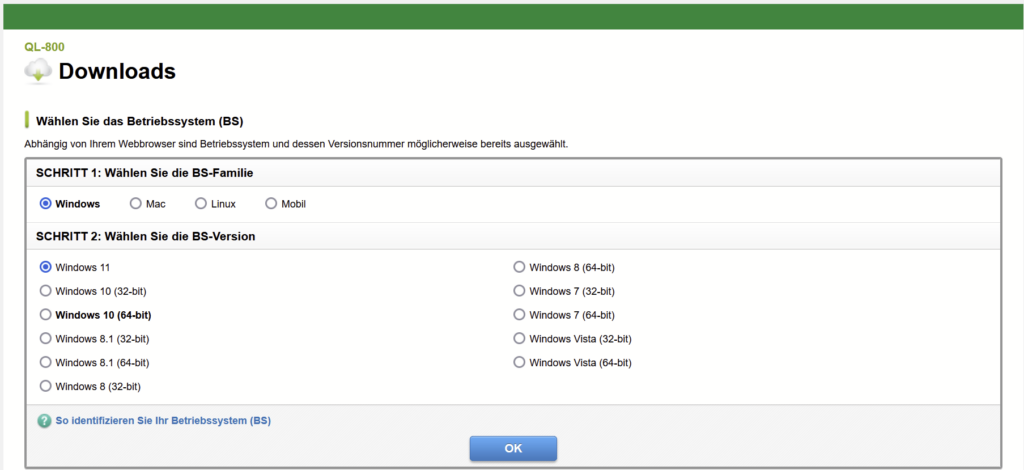
1) Install the driver
https://www.brother.de/support/ql-800/downloads
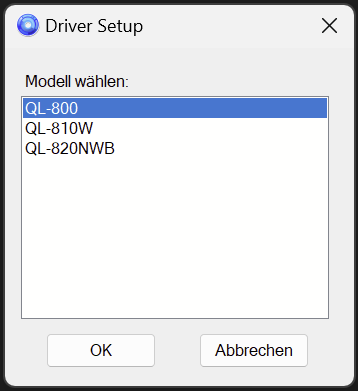
2) Connect the device to the PC via USB cable
3) Open the print settings in the PC’s system settings (not in the browser), select 54 mm as the ticket width and manually set the ticket length to 140 mm.
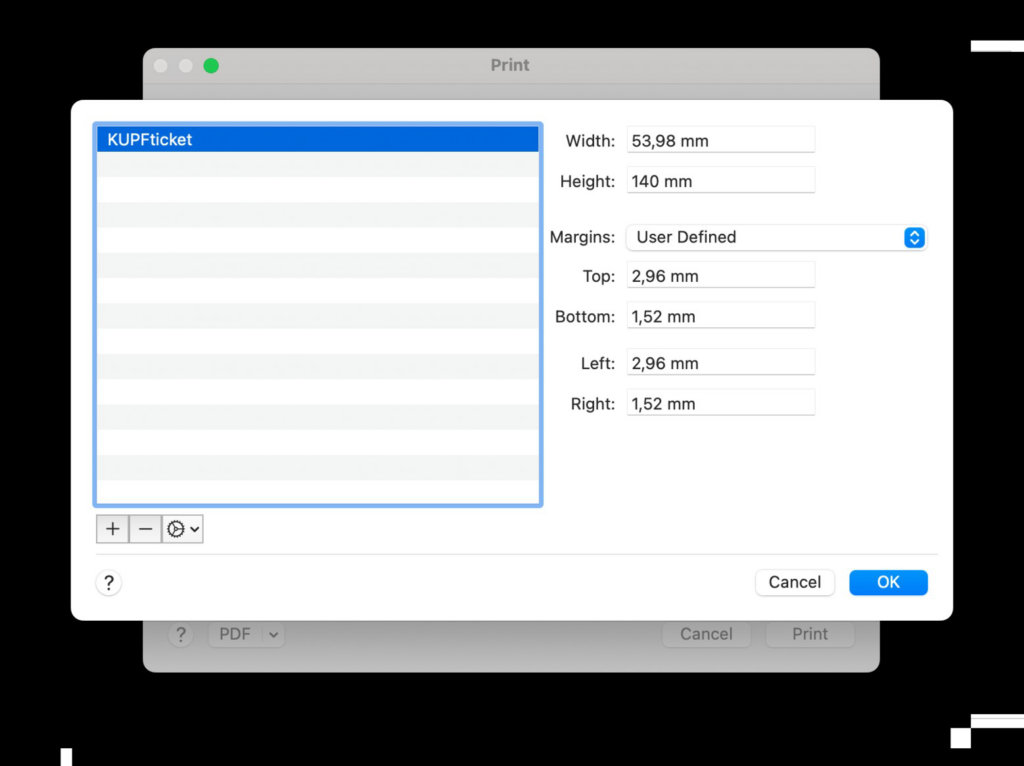
4) In the browser’s print dialog, define the following settings:
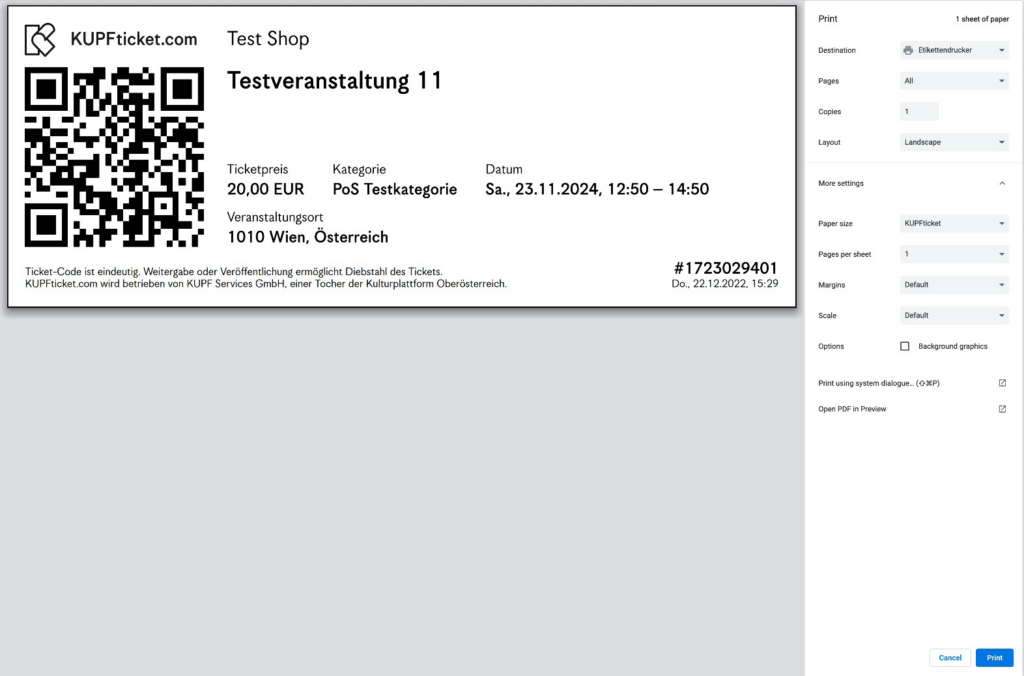
Here you can find the ticket rolls for the ticket printer:
Brother Store
You can find cheaper alternatives in the usual online shops.
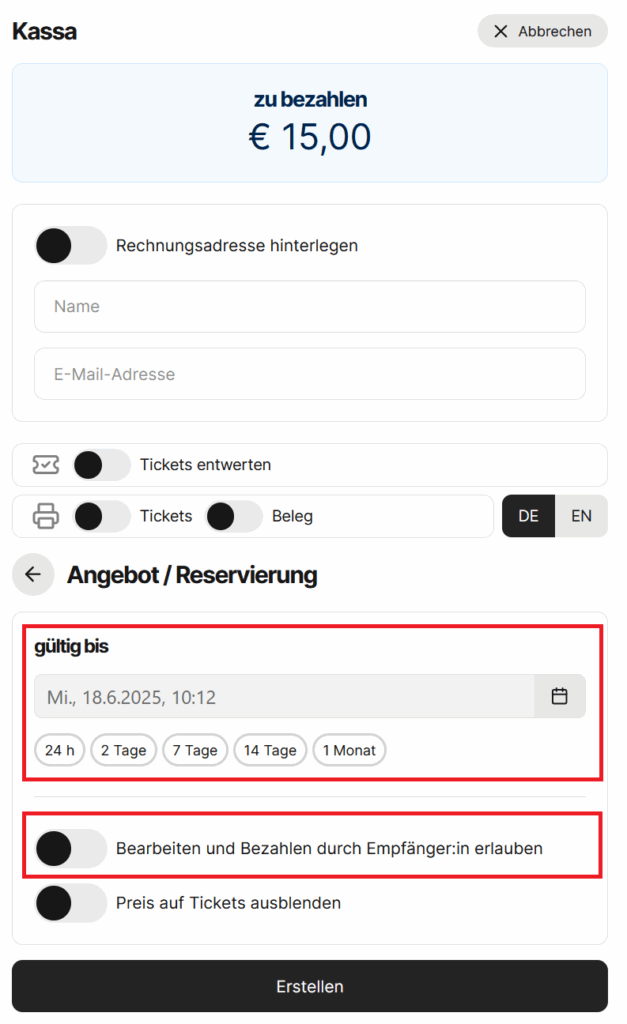
You can take reservations in the point of sale via the option “Create offer / reservation“.
If you enter the buyer’s email address and enable the option “Allow editing and payment by recipient”, the buyer can complete the payment process themselves.
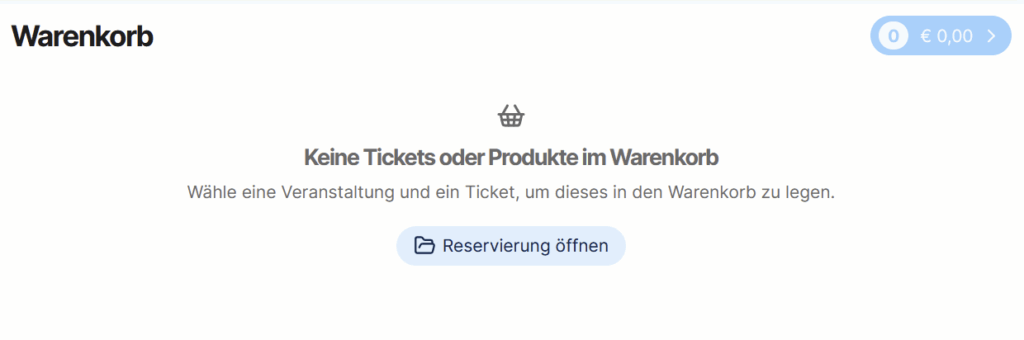
Under “Open reservations”, you can open reservations in the shopping cart at any time and complete the payment process (in cash or via terminal).
Point of sale (POS) stations such as box offices or advance sales outlets can be equipped with directly integrated card terminals and a printing system. The Stripe terminal connects to the ticket shop via the internet. The printer is connected to the PC or laptop via USB.
Purchase
POS card terminal: €299 net + VAT
POS card terminal docking station: €45 net + VAT
POS printer: €139.00 net + VAT
Rental
POS card terminal: €12 net + VAT per day
POS card terminal docking station: €2 net + VAT per day
POS printer: €6 net + VAT per day
Per rental, a flat fee of €30 net + VAT for preparation and return, regardless of the number of devices.
In case of damage to the devices, the renter is liable for repair or replacement costs.
Please order in good time – depending on device availability, delivery can take up to three weeks.
1) Select the event and category:
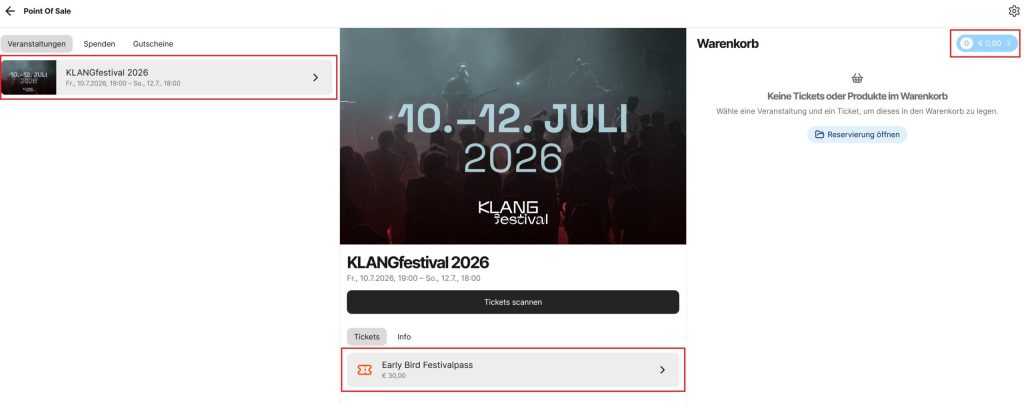
2) If the tickets are to be personalized or a discount needs to be selected, you can configure this in the next step:
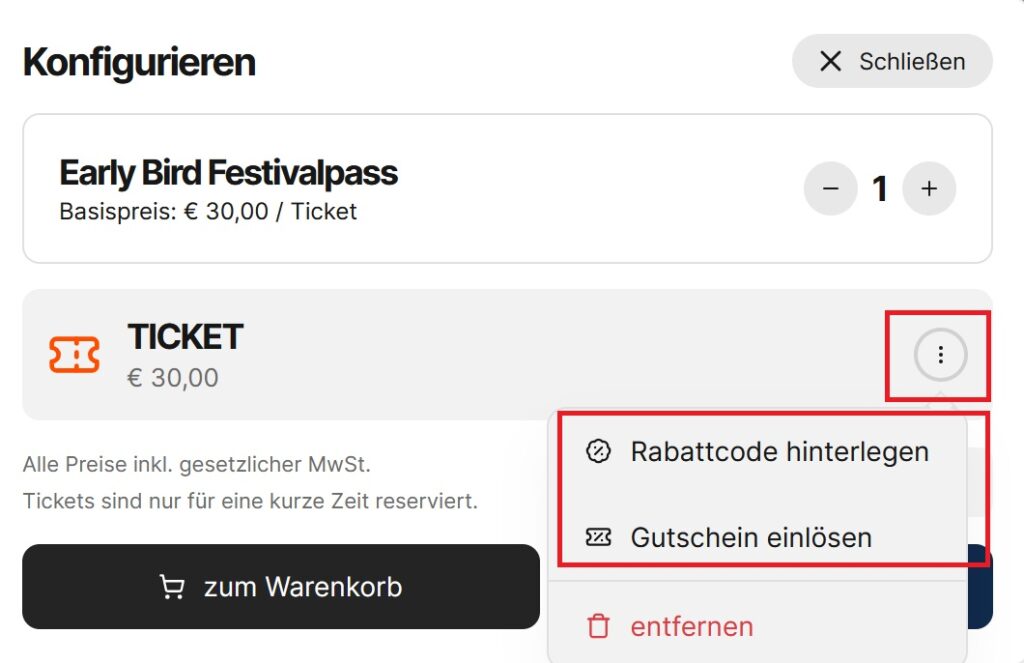
3) Once you select “to cart”, you can start the payment process in the top right corner:
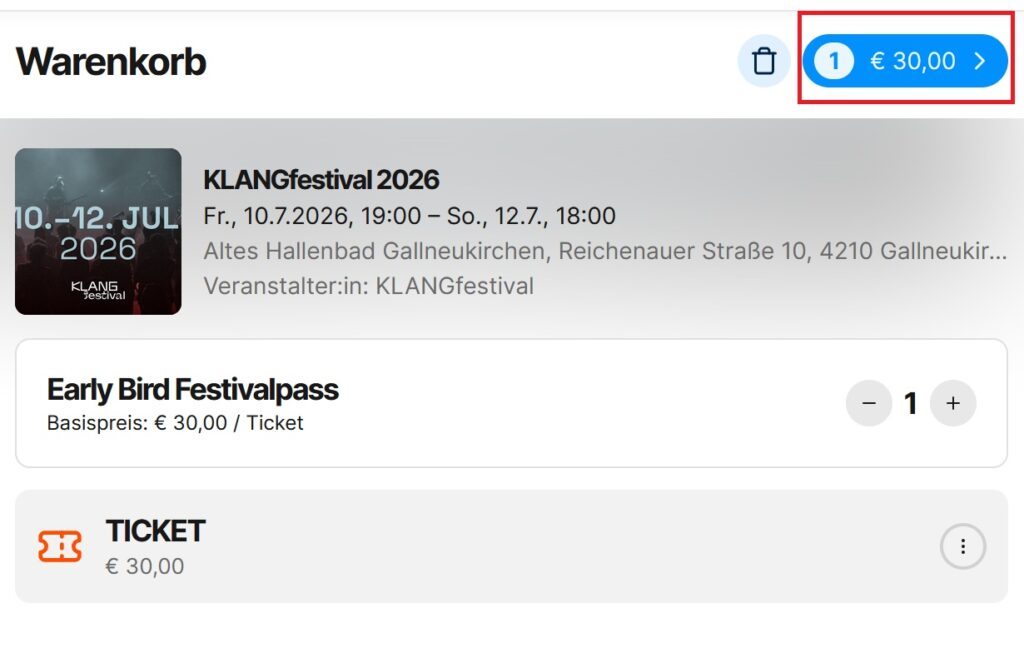
4) Now you can choose whether payment is made in cash or by card – you can also book reservations or free tickets here.
5) After successful payment, the tickets and the invoice are printed automatically on the printer provided.
To accept card payments via the POS as well, you need to add a Stripe terminal in the POS settings. To do so, go to “Shop configuration” in the main menu and select “Point of sale”.
1) Configure the point of sale
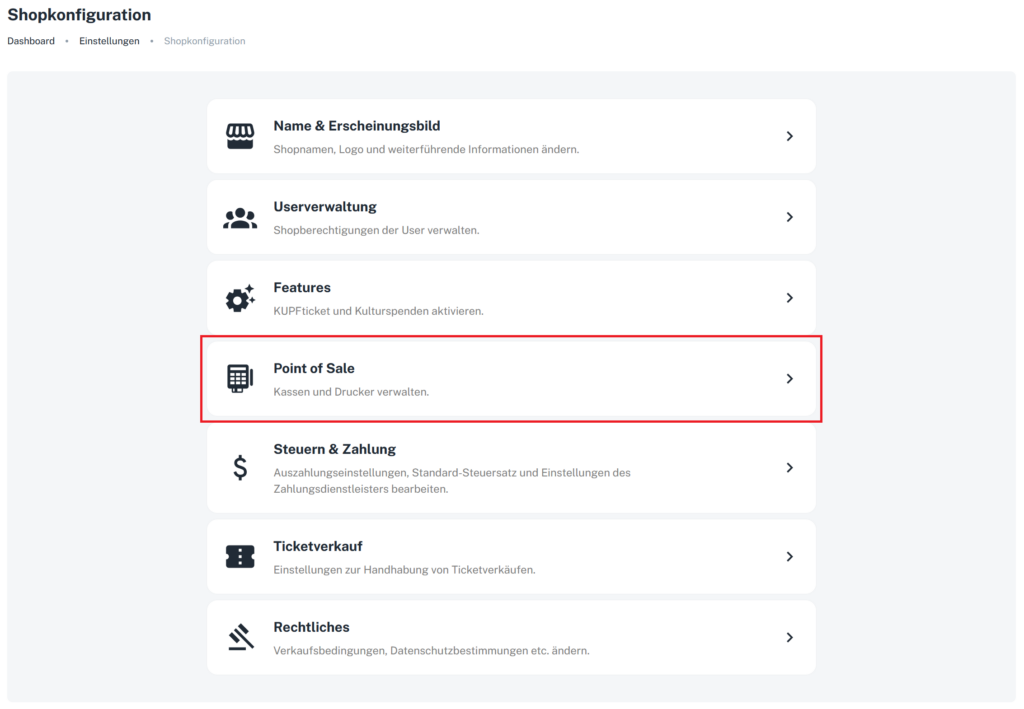
2) Add a register

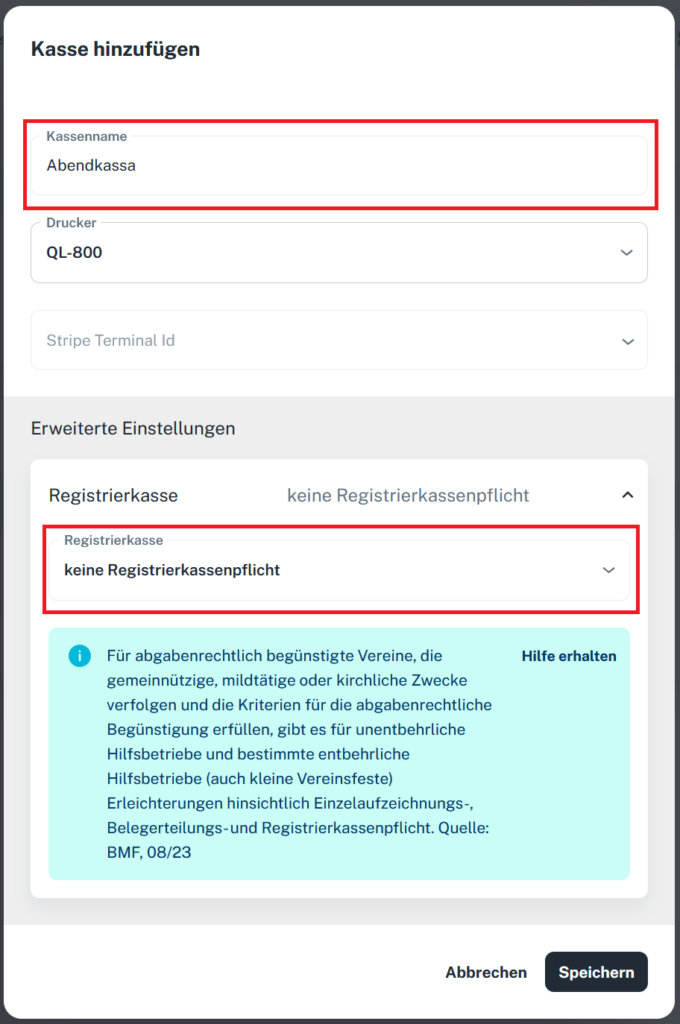
3) Add a Stripe terminal
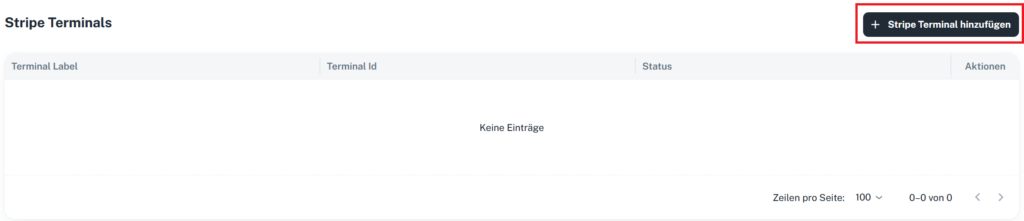
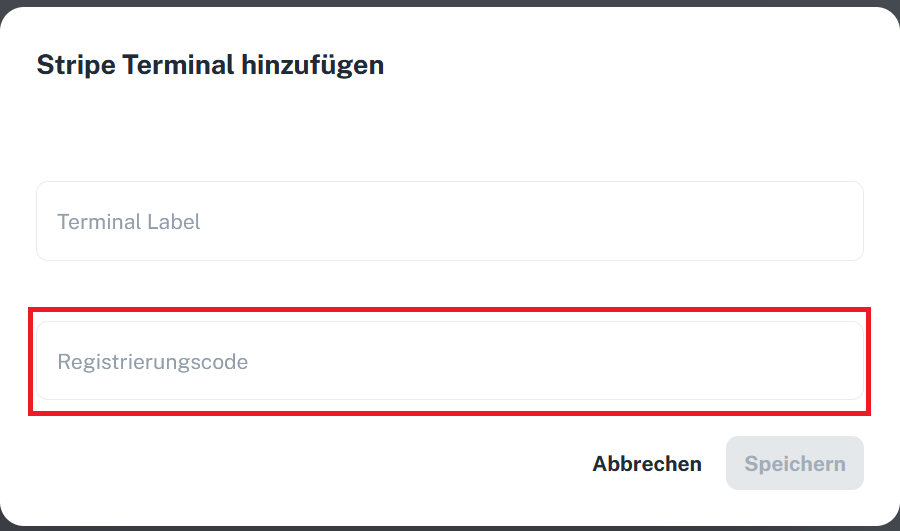
Now switch on the card terminal, connect it to a Wi-Fi network and wait until the registration code appears.
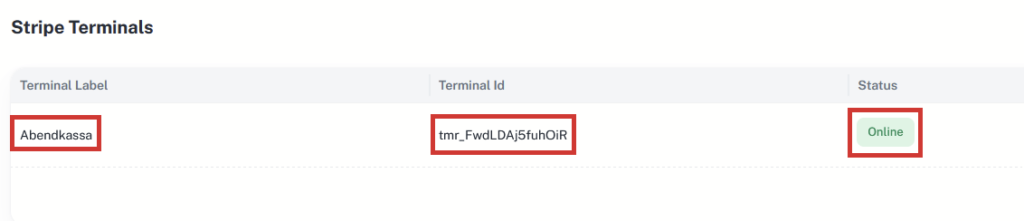
You can tell whether the terminal is connected to the shop by the status “Online”. Now the Stripe terminal just needs to be linked to the register.
4) Link register and terminal

Open the register’s edit mode by clicking the three dots and then “Edit”.
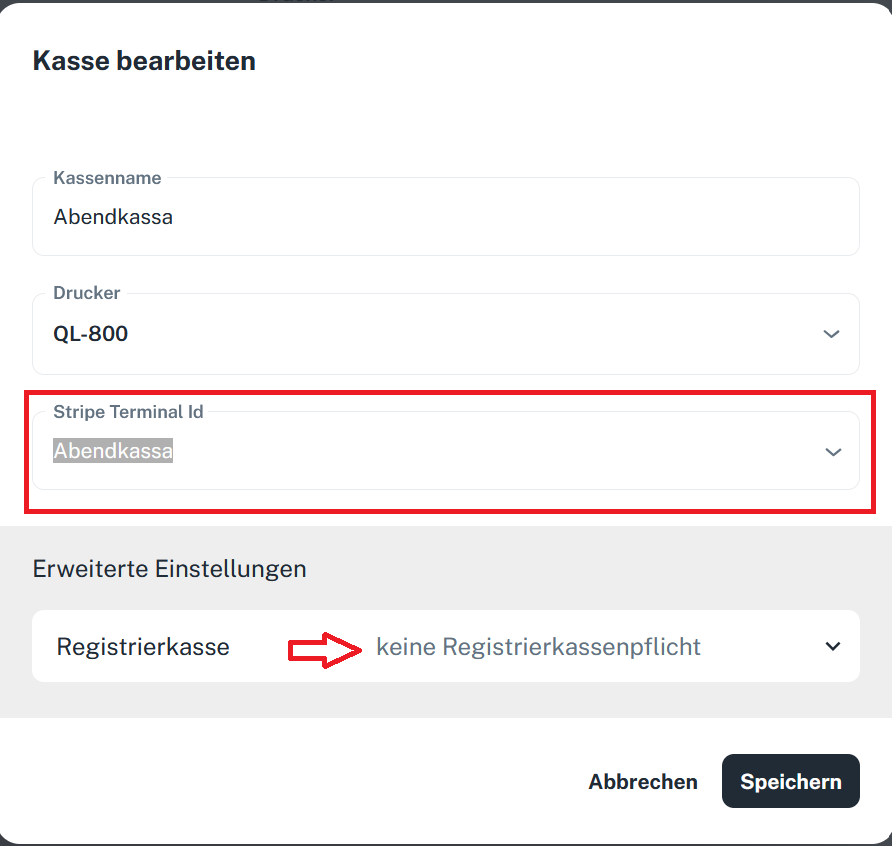
Now select the Stripe terminal you created earlier from the dropdown menu.
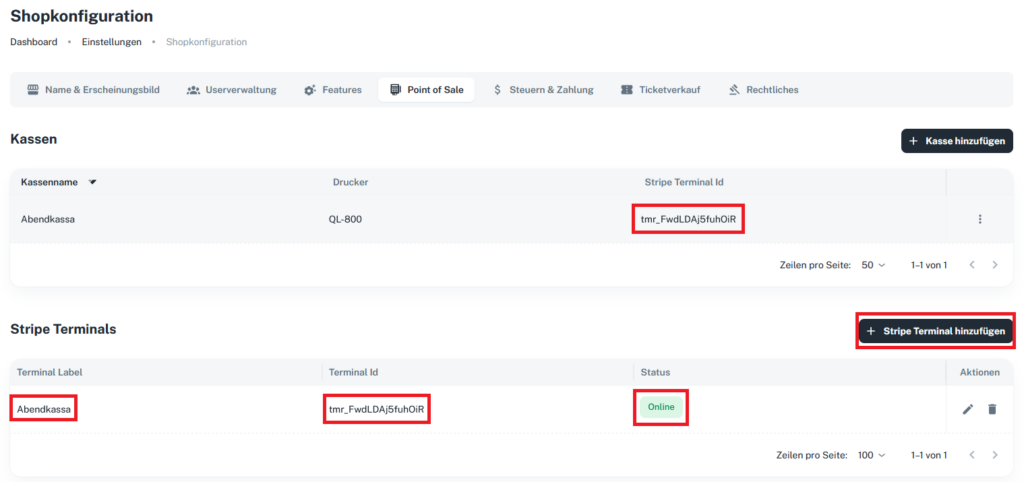
Once all settings have been made, the linked Stripe terminal appears next to the register.
If you need a cash register integration, you can set this up in the register’s edit mode:
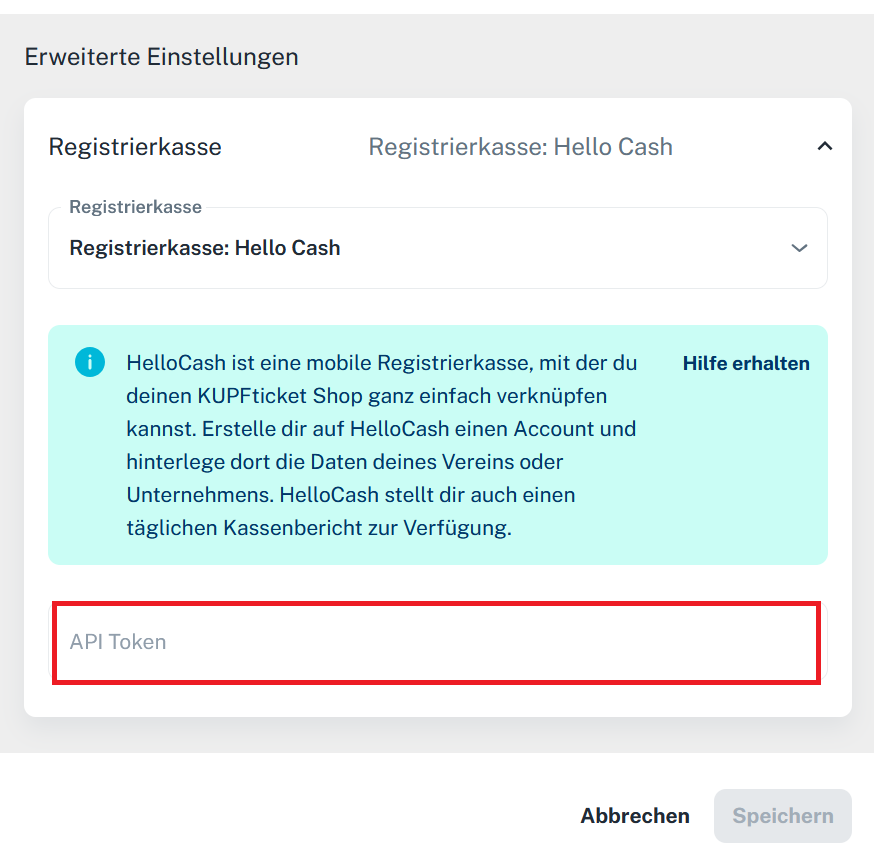
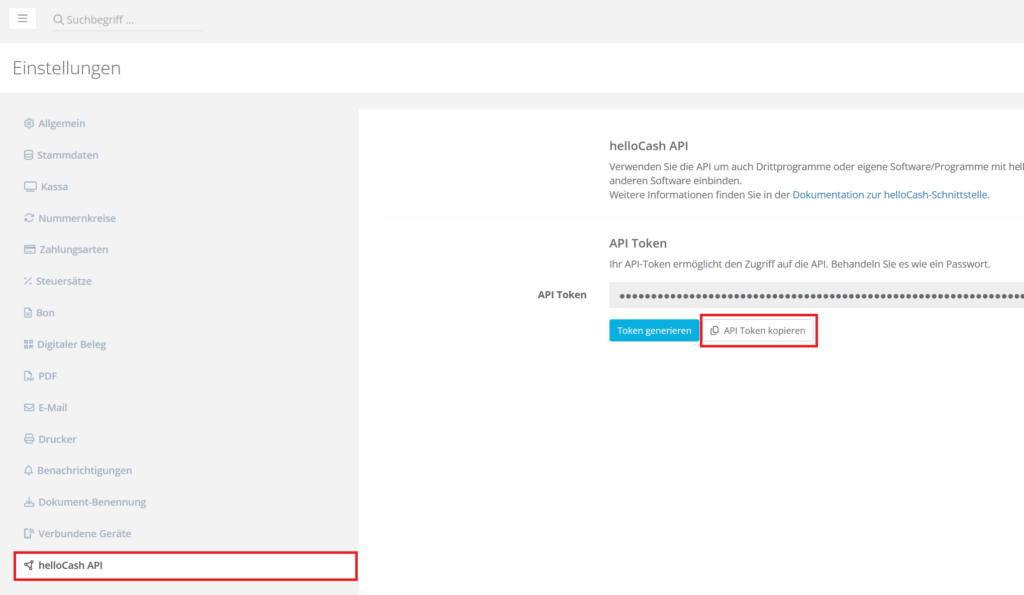


If you want to sell tickets on site, you can either use our free app or buy or rent our ticket printer together with a card terminal.
1) In the point of sale (POS), you can book tickets, create reservations or issue free tickets at any time.
2) We provide a printer for ticket printing. Ticket printing is currently only possible via the browser, not via the app. We recommend using Chrome.
3) For card payments, we’re happy to provide you with a brand-new Stripe terminal.
4) You can open the point of sale directly from the admin area.
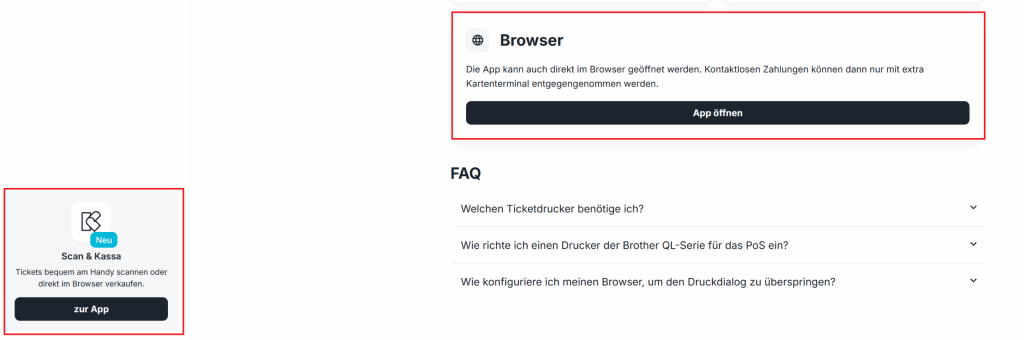
Note: With our modern app, you can sell tickets via “Tap to Pay” directly with your smartphone.
You’ll find all further settings in the respective entries of our FAQs.
Seating charts
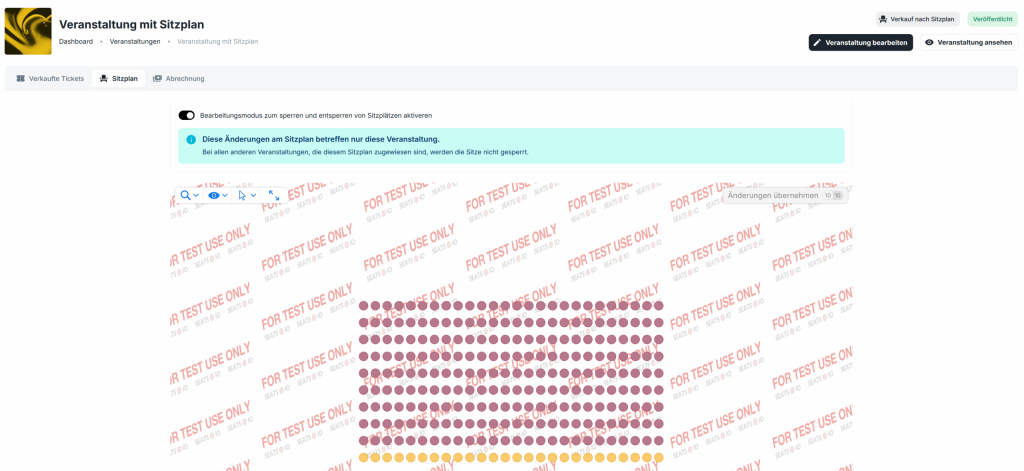
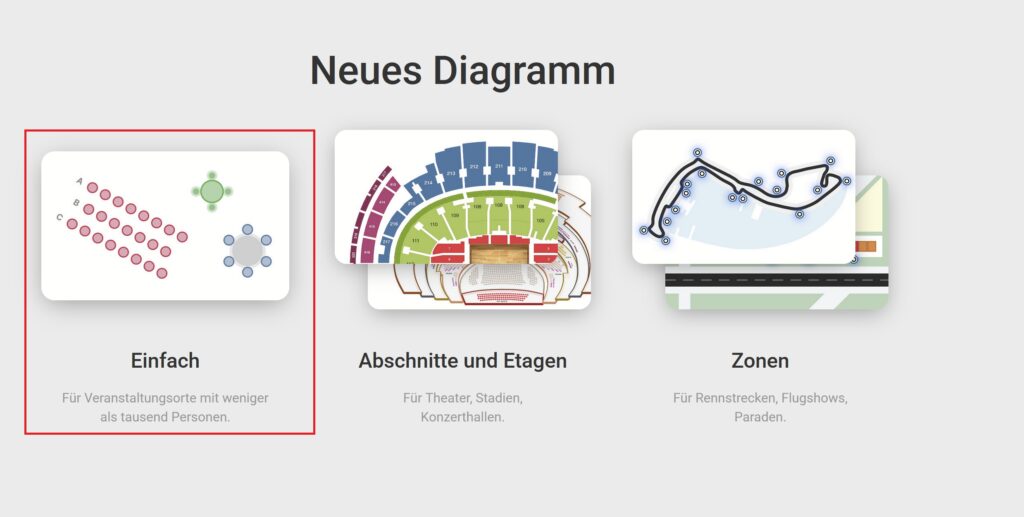
Under “Events” -> “Seating charts”, you’ll find the button “Create seating chart”.

In the next step, choose the option “Simple” – unless you want to create a particularly detailed seating chart.
If you need help creating your seating chart, feel free to email us at: [email protected]
Vouchers
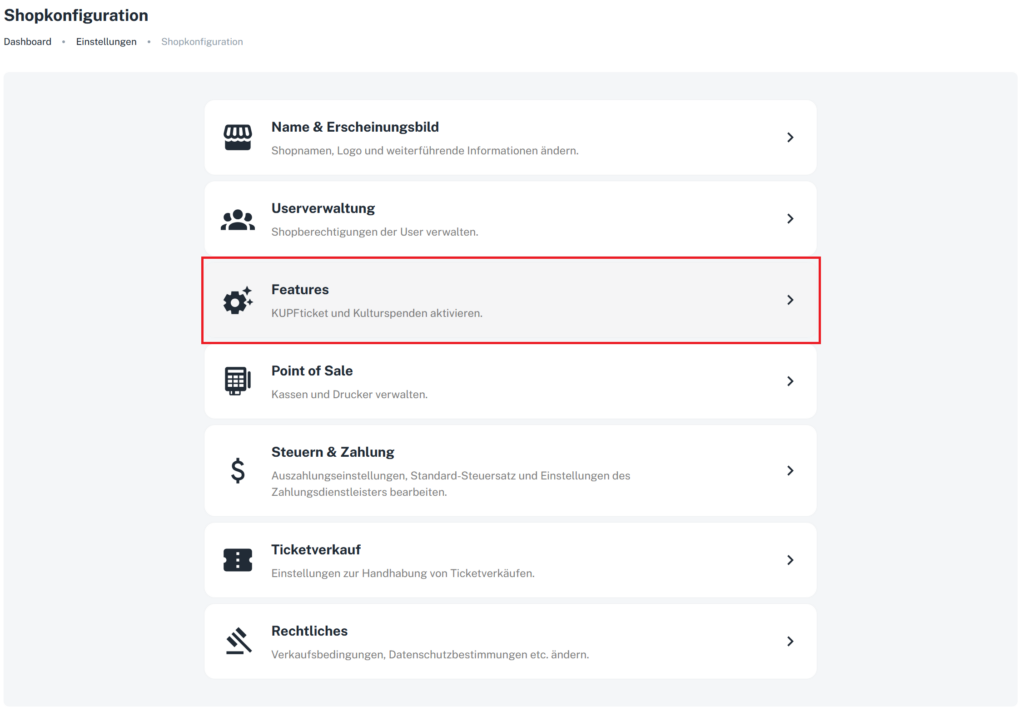
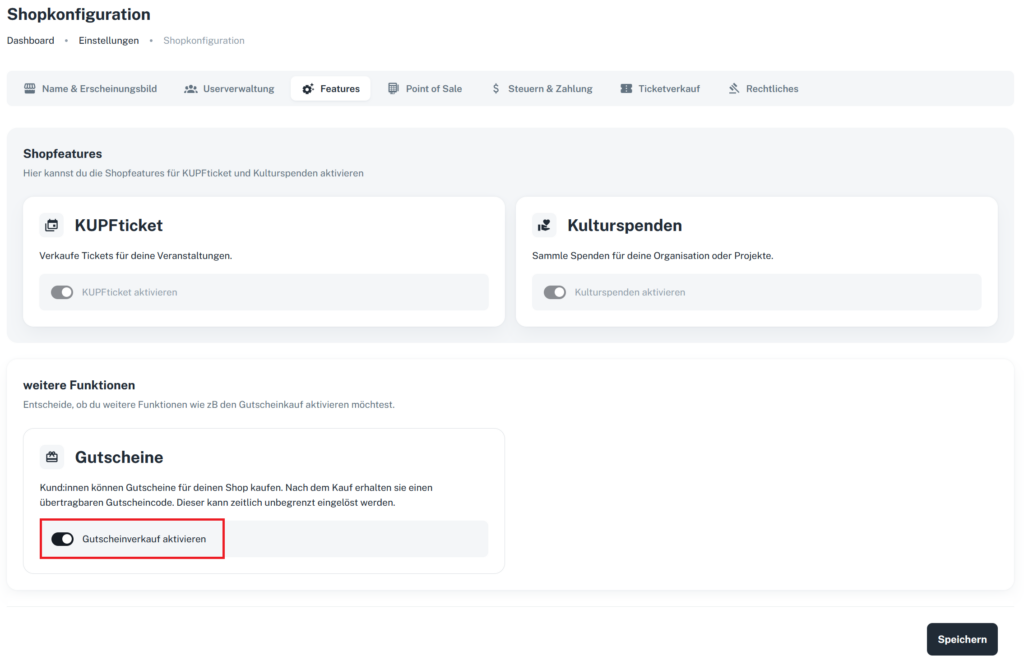
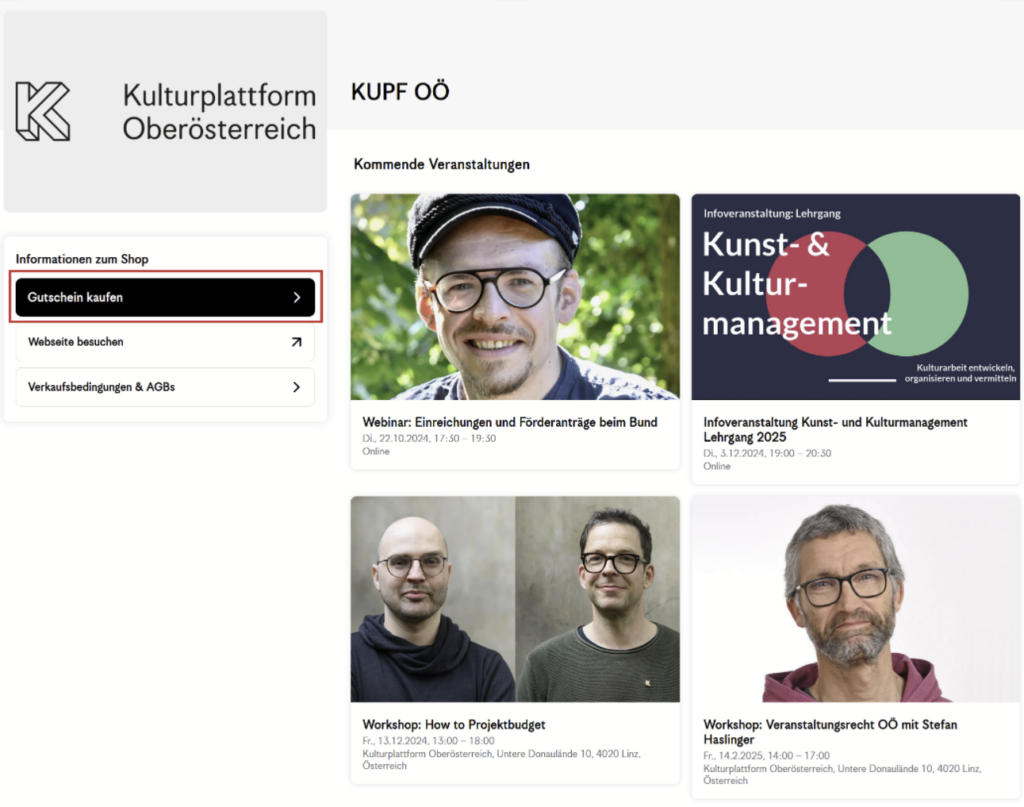
kulturspenden



Since January 1, 2024, tax-deductible donation status has been open to all non-profit associations, including cultural associations. Donations to a non-profit cultural association can now be deducted from taxes. An important criterion for obtaining this status is the association’s statutes. Do your statutes meet the necessary requirements regarding non-profit status? Here is a checklist.
All information (in German):
https://igkultur.at/praxis/spendenbeguenstigung-statuten-schon-gecheckt
Here you can find all the necessary information compiled by the Austrian tax office (in German):
https://www.bmf.gv.at/themen/steuern/spenden-gemeinnuetzigkeit/spendenbeguenstigung-neu.html
Note on the new tax-deductible donation status:
Since January 1, 2024, all non-profit organizations can opt into the list of donation-beneficiary organizations.
The tax office has compiled a clear FAQ on this (in German).
kulturspenden.at supports you with the required reporting of donations to the tax office. We’re happy to help if you have questions.
Step 1: Enable Kulturspenden
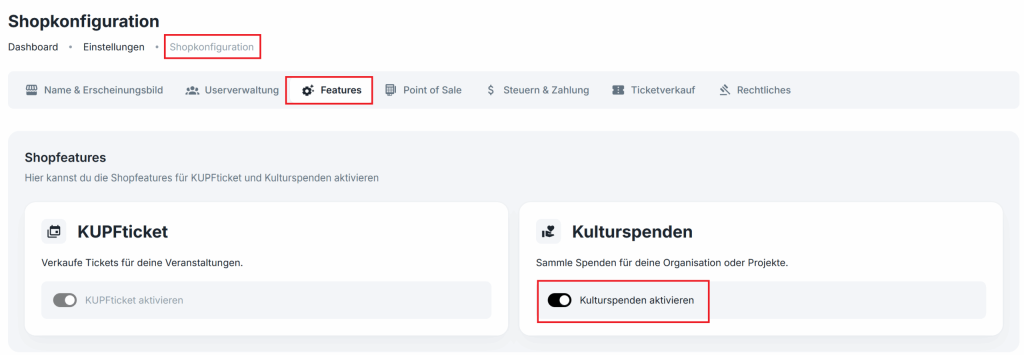
Under “Shop configuration” -> “Features“, you can enable the “Kulturspenden” feature at any time:
Step 2: Create a donation campaign
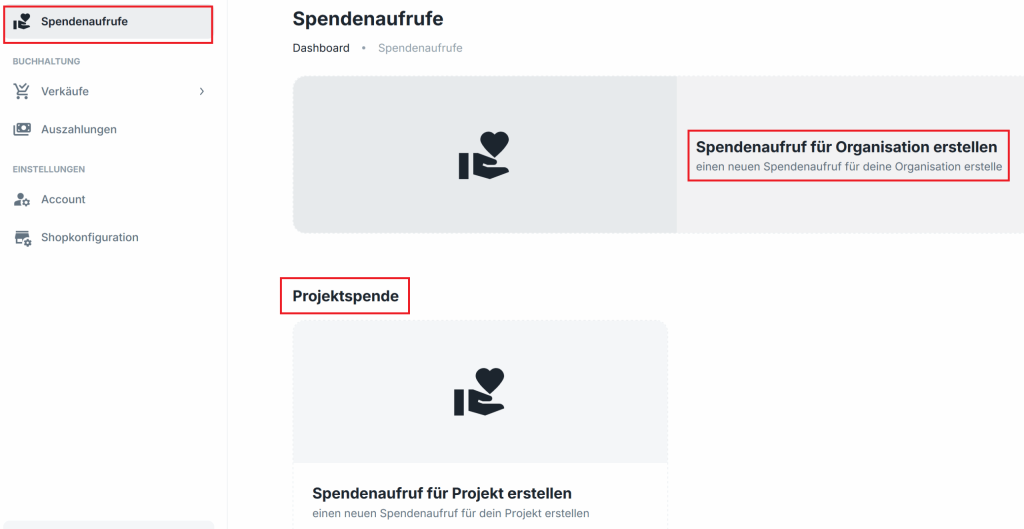
Now, under “Donation campaigns“, you can create a donation campaign for your organization or start a crowdfunding campaign (project donation) at any time:
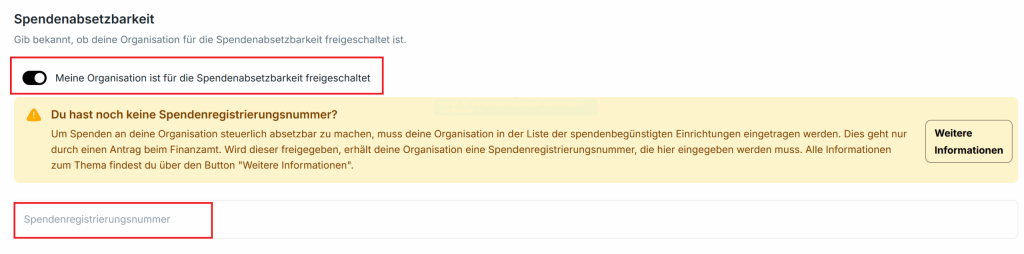
(optional) Step 3: Enable tax deductibility of donations
Under “Shop configuration” -> “Taxes & payment“, you can optionally enable tax deductibility if your organization is on the list of donation-beneficiary organizations.
The donation registration number uses the following format: KK–1234 -> don’t forget the hyphen. It is sometimes missing in the authority’s notice.
Help & support
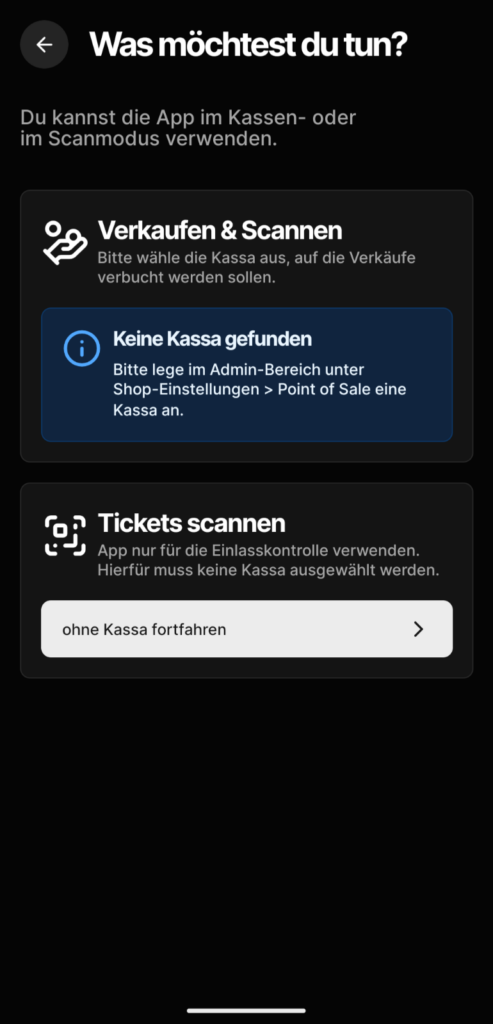
Important: don’t forget to add a register: If you haven’t used the point of sale yet, you still need to add a register. See “Point of sale: add a register”
As part of verification, Stripe may request additional documents from you. This is a normal part of the verification process and serves to verify the details stored with Stripe.
Depending on which details need to be verified, Stripe may request different documents:
Proof of organization
- ZVR extract (for associations)
- Company register extract
- Notice of tax-deductible donation status
- VAT registration
Proof of identity
- Passport
- Driver’s license
Proof of private address
- Registration form (Meldezettel) or confirmation of registration, issued within the last 12 months
- Electricity or gas bill, issued within the last 6 months
- Bank statement, issued within the last 6 months
- Annual financial statement
Which document you need to upload depends on Stripe’s specific verification request. Please upload only the document requested by Stripe and make sure it is complete and clearly legible.
You can find a complete overview of the documents accepted by Stripe in Stripe’s documentation.
Important for associations
If you represent an association or non-profit organization, take particular care to enter the details correctly when setting up your Stripe account. Do not select additional roles such as “board”, “owner”, “director” or similar company roles if they don’t apply to your association. Otherwise, Stripe may wrongly classify the association as a conventional company. In that case, the ZVR extract may no longer be accepted as proof of the organization and Stripe may request additional documents.
Guide for associations
That’s why we’ve created a dedicated guide to shop setup for associations (in German). Please use it when setting up your shop and especially for the Stripe verification. The manual explains step by step which details associations must provide and which company roles should not be specified in Stripe.
If Stripe needs a document from you, you’ll find the request directly in your Stripe account. To access it, open “Taxes & payment” in the shop settings and sign in to Stripe.
No question matches your search.